Wednesday, April 27, 2011

Generating Generics: Creating Classes at Run Time in Flash

Class Creation Test

This is a simple demonstration of class generation in Actionscript using the as3-commons-bytecode library.

Here I demonstrate creating parameterized classes (generics). In this example we create a Tuple class given a spec containing the names, types, and visibilities (public, protected, or private) of the class’s data members. The class is named appropriately, e.g. Tuple<String , Point, Rectangle>, and it is given a constructor method that requires parameters of the indicated types in the order that they will have in the tuple. I use the as3-commons-bytecode library to generate the class, and then load the class into the current ApplicationDomain. Once a couple of specified classes are loaded, I examine them with describeType() and construct an instance of each generated class.

The bytecode for the constructor doesn’t depend in any way on the types of the parameters; it’s just a matter of putting them on the stack and initializing the respective properties with them [...]

Read more: Generating Generics: Creating Classes at Run Time in Flash

Tuesday, April 26, 2011

Introducing Mixing Loom – Runtime ActionScript Bytecode Modification

At this year’s 360|Flex conference in Denver, Mike Labriola and I unveiled a new project we’ve been working on called Mixing Loom. Our presentation was called “Planet of the AOPs” because Mixing Loom lays the foundation for true Aspect Oriented Programming (AOP) on the Flash Platform. Mixing Loom provides Flex and ActionScript applications the hooks they need to do bytecode modification either before runtime or at runtime. Through bytecode modification an application can apply a behavior across hierarchies of objects. There are a number of behaviors in a typical Flex application (such as logging, security, application configuration, accessibility, and styling) that could be represented as Aspects. Today these behaviors must either be included in every class that needs them or included way down the object hierarchy (i.e. UIComponent). With Mixing Loom a compiled SWF can be modified (applying necessary behaviors) after it’s been compiled or as it’s starting up.

If you are building Flex apps and want to take advantage of AOP then Mixing Loom is probably a bit lower level than what you need. Mixing Loom combined with AS3 Commons Bytecode provides the foundation for AOP systems to be built on top of. We hope that by providing developers the hooks to modify bytecode that frameworks will emerge that provide application developers higher level APIs based on AOP. As Mike says, “Mixing Loom kicks off the Summer of AOP.”

If you are one of those developers who likes getting dirty with bytecode modification then you might want to check out the slides from the “Planet of the AOPs” session:

If you are still following along and looking for more details on how to use Mixing Loom, then keep reading. Flex applications are broken into at least two pieces. The first piece is the thing that displays the loading / progress bar. That is located on the first “frame” of an application’s SWF file. The rest of the application is on the second frame of the main SWF and possibly in other SWF files like Modules and/or Runtime Shared Libraries (RSLs). Mixing Loom provides two ways to modify the bytecode of a running application. First, using a custom preloader an application can modify its second frame and/or any Flex Modules before they are loaded into the VM. The second way is to use LoomApplication and a custom preloader, which allows an application to modify its second frame, modules, and/or RSLs (even the signed Flex Framework RSLs). Let’s walk through a simple example of an application that uses a custom preloader to modify a string that exists in its second frame.

Let’s take a simple object Foo that has a getBar method, which returns a string “a bar” [...]

Read more: Introducing Mixing Loom – Runtime ActionScript Bytecode Modification

Monday, April 25, 2011

Beginner’s ActionScript 3.0 Object Communication: OOP’s Essence

Beginner’s ActionScript 3.0 Object Communication: OOP’s Essence

My favorite OOP quote for beginners is about communication–sending messages, and just about everything I read on Parallel Programming (//P) is about communication. So I thought it’d be a good idea to have a post for beginners first and follow it up with a parallel programming post about object communication. First, I want to look at communication in OOP programming, and in a second post, communication in //P. They have a good deal in common and a good deal of differences [...]

Read more: Beginner’s ActionScript 3.0 Object Communication: OOP’s Essence

ActionScript 3.0 Communication in Parallel Programming

Communication in a Parallel Environment
This week I decided to do one post for beginners and one for those of you interested in parallel programming and was able to use a simple program for both. The program is one with a client that communicates through a single abstract class requesting house parts in the form of Shape instances. Not a true design pattern, but no matter; it illustrates OOP communication and parallel decomposition [...]

Read more: ActionScript 3.0 Communication in Parallel Programming

FlashONGames: Building Multi Platform Games in Flash, HTML5 and Native Applications with haXe

Building Multi Platform Games in Flash, HTML5 and Native Applications with haXe

We’ve been asked to give a presentation at FlashONGames, a Bay Area (read San Francisco, California) group that runs a regular meetup / mini conference normally held at Adobe’s headquarters in San Jose.

If anyone has anything they think I should talk about, or things I should show, please comment or email me directly at tarwin@touchmypixel.com.

Please come along if you’re in the area. You can also check a live stream out if you want to learn (laugh) from afar!

FlashONGames: http://flashongames.com/

My Presentation: http://flashongames.com/post/4535797807/building-multi-platform-games-in-flash-html5-and

Read more: FlashONGames: Building Multi Platform Games in Flash, HTML5 and Native Applications with haXe

Saturday, April 23, 2011

FlashGameLicense Blog: Dillo Hills: Optimizing Games for Playbook and Mobile

[This is a guest post by Justin Smith, who created Dillo Hills for the PlayBook, Android, and other mobile platforms. Justin has some great insights to offer on creating games for these platforms!]


PREFACE

Over the past few days, I’ve been working very closely with Adam Schroeder from FGL to playtest Dillo Hills on the Playbook. He’s been very helpful in the testing process, and he’s asked me if I’d be interested in writing about my experience developing the game: from the basic experience of working in AIR, down to some of the specific tricks I’ve used to optimize rendering for mobile.

PROJECT OVERVIEW AND STATS

Dillo Hills was my first experience programming for mobile devices. I worked with an artist (changko) and an audio guy (strike911), both of whom were also new to mobile development.

The game was originally developed for the Android platform, but the code for the Playbook version is almost completely identical, so all of the tips and tricks I talk about here should apply to both platforms!

The game, for anyone who is unfamiliar, is essentially a spinoff of Tiny Wings. Your main goal is to build up speed by rolling down hills, then use that momentum to ramp up into the sky and soar. We built on to the original concept by adding in obstacles, bonuses, and by tweaking the physics a bit to give something that feels a bit more fast-paced and visceral than the original game.

The game was released on Android near the end of March, was approved for the BlackBerry Playbook a couple days ago, and will be coming to Flash and iPhone in April (hopefully). The entire development of the game, from the moment I got the idea to the moment we released on the market, took exactly 3 weeks.

Reception has been mixed, but mostly positive (4/5 on Android Marketplace). The biggest source of negative reviews has been from users who are simply not able to run the game at an acceptable framerate, or experience problems installing the game. Out of all the users who are able to install and run the game smoothly, feedback has been reassuringly positive.

Sales have been pretty nice. Nothing outrageous yet, but certainly worth the time we invested, and still growing steadily. During the first 10 days after the game was released, we sold roughly 3000 premium versions of the game, and had about 25,000 downloads of the free version, which yielded just under 300,000 ad impressions using AdMob.

As for my own impressions of the game? I’m very excited and pleased with where the game is headed, but I’m also very eager to continue working on the game, improving performance, and adding some more gameplay features to keep people entertained longer. I’ve learned a lot of important lessons that will probably have an impact on how I develop games for mobile in the future.


OPTIMIZING TIPS AND TRICKS

1) GPU vs. CPU

The first hurdle you’ll face when developing a game for mobile is deciding whether to use GPU rendering or CPU rendering. Based on my experience, it seems like GPU rendering is faster when you are working primarily with bitmaps (or objects that have cacheAsBitmap=true) and placing them directly onto the stage / display list, and CPU rendering is typically faster when rendering vector shapes or using blitting as your primary means of rendering. Again, this is only based on the testing I’ve done, and your own results may vary. I recommend trying both until you find the one that works best for your game on the most devices.

For Android applications, you can choose either CPU or GPU rendering from the Publish Settings menu (in the Flash Pro IDE). For the Playbook, I had to manually add this line inside the <content> object (which is inside the <initialWindow> object) of my DilloHills-App.xml file:

<renderMode>gpu</renderMode>

However, when I enabled GPU rendering before compiling to a BAR file, the BAR would no longer render anything but a black screen when testing in the Virtual Machine. This appears to be a bug with the VM, as the game runs fine on the actual device. It’s also worth mentioning that Eric Heimburg from FGL was able to get his games to run inside the Virtual Machine with GPU rendering enabled, and it actually showed a pretty significant performance increase even within the VM, so be sure to try it out for yourself!

Dillo Hills was written and optimized for GPU rendering, so most of the techniques I mention here will be directed towards GPU rendering. A lot of these techniques are also great things that you should be doing in all of your applications (especially object pooling!), but are going to be nearly mandatory when developing for mobile.


2) Size does matter

[...]

Read more: FlashGameLicense Blog: Dillo Hills: Optimizing Games for Playbook and Mobile

Thursday, April 21, 2011

AS3 101: OOP – Introducing Design Patterns

After many months of learning how to program from the ground up, you’re ready to put it all to use: we’re going to build a simple drawing application. We will focus on Object-Oriented Programming techniques, specifically the use of interfaces. By setting up a few rules for our programming, we will make expanding the feature-set and debugging the project much easier.


Final Result Preview

You’ll see that our little drawing app will be rather simplistic. Rest assured, though, that the internal logic just might make your brain explode. Don’t worry; we’ll take it one step at a time, as we always do. Here’s a peak at what we’re working towards in this tutorial:

While the result is simple, the underlying code is complex, and one of the things you’ll hopefully learn along the way is that Object-Oriented Programming can keep you organized and keep your project maintainable.


Step 1: Create the Project

First things first: we need a home for our project. Start by creating a main folder for the entire project. Use the approach that works best for you. It could be as simple as creating a folder on your computer, using the OS, or using Flash Builder to create a new project for you.

It doesn’t matter where this folder is created, so long as you can get to it when we need to save or open files.

I’ll be calling this app “Drawr,” so I’ll be naming my folder accordingly. The name is of little consequence to the rest of the tutorial, so if you’re feeling imaginative come up with your own name.

My project folder

Step 2: Create the Flash File

Open up Flash CS3 or higher, and choose File > New and then select the ActionScript 3.0 option. This will be our Flash file for the project.

The New Document Window

Save it to your project folder as “Drawr.fla” (or whatever name you feel is better).

Our Flash File

Step 3: Create a Classes Folder and the Source Path

We will organize our class files into packages, but for further organization, let’s create a source path.

Create a folder in your project folder named “classes“. All of our classes (and package folders) will go in here [...]

Read more: AS3 101: OOP – Introducing Design Patterns

Wednesday, April 20, 2011

ActionScript 3.0 and Parallel Programming: Get Ready for Decomposition

Re-Thinking Algorithms
I’ve been looking at a lot of materials on parallel programming attempting to sort out the issues involved. One of the big issues is granularity, and not only does granularity affect the way we think about design patterns, it also impacts algorithms. To make matters even more interesting, granularity is affected by the number of cores your computer has, and so not only is it important to consider the level of granularity for a general level of programming efficiency, it’s also important to consider the hardware [...]

Read more: ActionScript 3.0 and Parallel Programming: Get Ready for Decomposition

Monday, April 18, 2011

ActionScript 3.0 and Multithreading #2: Green Thread Interleaving

Interleaving Threads
With access to a single processor, any green threads need to take into account interleaving. This post provides a demonstration of using interleaving with a Factory Method pattern. Basically, interleaving refers to two threads being processed simultaneously. One part of a thread is processed, and then a part of another thread is processed [...]

Read more: ActionScript 3.0 and Multithreading #2: Green Thread Interleaving

Friday, April 15, 2011

Video of me coding Breakout in Flixel in 20 mins

coding Breakout in Flixel in 20 mins

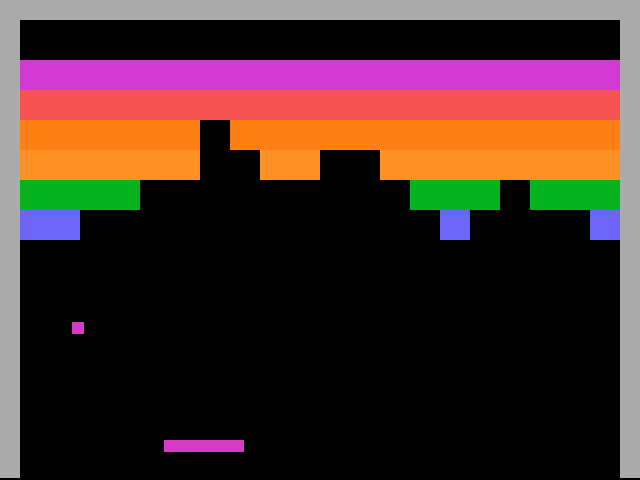
Having spent the past couple of days deep in Microsoft Word writing tech specs, I was desperate to do some coding. But I only had a 1 hour lunch break available. So I picked a game: Breakout (Atari 2600 style), found a reference screen shot online to get the colours from, fired-up FlashDevelop, hit record and started coding.

20mins later and it was done. I then hastily cut this video together and uploaded to YouTube (which ironically took longer than coding did). Here’s the video embedded. I sped it up x2 for sanity sake, and it’s a nice way of hiding my typos :) If you can please watch it in HD on the YouTube site, it’s much easier to see what I’m coding!

Watch on YouTube

Ok so it’s not a gaming master-piece, but there’s a real solid shell of a game here you are free to take and expand as you wish. The first thing you may want to do is drop the “cheat wall” from the bottom, add some lives, a score and level progression :)

Full source code after the jump.

This is for Flixel v2.5. Create a new Project that is 640×480 at 60fps, with a black background. My thanks to Adam for clarifying some new 2.5 nuances before I started this :)

Read more: Video of me coding Breakout in Flixel in 20 mins

RGB Wheel Tracker

Hi dear readers, I've worked on a simple RGB recognition algorithm which is nicely accurate.

Let me show you a little demonstration :

RGB Wheel Tracker from didier.brun on Vimeo.

Algorithm

The algorithm is based on a paper I've read a few years a go, but I can not find the link. The idea is ready simple and require a simple pass on the image.

The first phase is to compare the proportional amount of red, green and blue from 3 relative points, and calculate a score for each pixel.

The second phase is then to blur the result, apply a threshold on the image.

The last phase is to find the blob with the biggest size.

This algorithm is applied for each orientation pattern according to this logic :

  • Iterate the marker searching on each orientation, one by frame rendered (top red, top blue, top green, top red, top blue, ...)
  • If a marker is found, keep the searching on the corresponding orientation only
  • When the marker is lost, iterate on the 3 orientation (point 1) until a marker is found

A sample image :

RGB Wheel Tracker sample image

The algorithm [...]

Read more: RGB Wheel Tracker

AS3 101: OOP – Introduction to Interfaces

In the closing chapters of our Object-Oriented Programming series, we will take a look at some more advanced concepts, focusing on interfaces (the programmatic kind).

This may be the final installment, but we’ll be splitting the content into two parts. In this part, we’ll get an introduction to interfaces, and begin to use them in small projects. In the next part, interfaces will play a key role in a bigger, more practical application: a simple drawing program.


(There Is No) Final Result Preview

The projects that we’ll be working on are many and small. The functionality contained therein is purposely kept to a minimum, so as to focus on the concepts and not get lost in programmatic details.

If you’re jumping into this series at this article, I recommend that you make sure you’re up to speed with the rest of the concepts introduced in not only the previous Object-Oriented Programming tutorials, but the core concepts of the rest of the AS3 101 series. This material is not exactly for the faint of heart, but if you feel confident you know that other material well, you won’t have any problems. Just stick with me, and you’ll learn a few things.


Step 1: The Interface

You won’t be begrudged for thinking that, when I mention the “interface”, I’m talking about the UI of a program, on-screen. And while that is, indeed, an interface, we’re here to discuss a more advanced Object-Oriented topic of the same name.

Imagine, if you will, a music studio, with lots of electronic gear (for our purposes, the more discrete pieces of equipment the better; note of this all-in-the-computer-box music stuff).

A music studio with lots of gear

Photo from Flickr user The Cowshed and is distributed under a Creative Commons Attribution-NoDerivs 2.0 Generic license

In the end, all of these disparate noise makers need to get routed to the noise recorders, and then the recording gets played back and recorded as a mix. A lot of audio needs to get from point A to point B to point C, with lots of points in between.

Now, as you probably know, sound – in electronic form – travels from one point to another via a cable. Plug one end of the cable into the thing producing sound, and the other end of the cable into the thing receiving the sound, and you have a signal.

Imagine how difficult this would be if each musical equipment manufacturer created its own type of plug for the cables. You’d be stuck with only equipment from a single manufacturer, or possibly with several dozen adapters lying around to connect these incompatible inputs and outputs.

Fortunately, there are a few standards to which all manufacturers adhere. This is a bit of a gross simplification, but nearly all audio jacks you’ll find in a music studio will be one of two kinds: XLR or quarter-inch (audiophiles, let’s ignore impedance and balancing, as well as other jacks like RCA). Thankfully, with only two types of cable, and the occasional adapter, you can connect virtually any piece of audio gear to any other.

The way in which a piece of gear connects to the rest of the world is its interface. In a generic sense, you can see how this applies to user interfaces, as well – it’s how the software connects to the outside world (i.e., the user). But the audio interface for a mixer or keyboard is that piece of gear’s particular capabilities for input and output using which kind of plug.

A Patch Bay, used to interconnect many different pieces of gear in a studio

Photo from Flickr user The Cowshed and is distributed under a Creative Commons Attribution-NoDerivs 2.0 Generic license


Step 2: Bringing It Back to Programming

In the same way as audio equipment, the interface of an object is the way in which it connects to the outside world. Now, “connect” is probably not the best word to use. Let’s use “makes itself available” instead.

All objects will have an interface, whether you think about it or not. You can think of the interface to an object as all of the public methods and properties belonging to that object. Put another way, the interface of an object is the stuff you can do to that object.

So when you write a class, and define four public methods, three private methods, and two protected methods in it, the interface to the objects is made up of the four public methods.

You have probably heard of the acronym “API”. It’s quite the rage these days in the form of web service APIs, such as the Flickr API or the Google Maps API. API stands for “Application Programming Interface.” In this sense, the interface is the set of methods you can call on the web service, defining not only the name of the methods, but the parameters you can send to it and the type of data that will be returned.


Step 3: Implementations

Let me pause briefly and bring up encapsulation again (one of the core principles of Object-Oriented Programming – see the first part of the OOP series for more information). Note that the interface is not made up of private, protected, or internal methods and properties. Those members are hidden away from the outside world, vis-a-vis, not part of the interface.

Similarly, it’s important to understand a subtle distinction between the interface, as seen from the outside world, and the implementation. That is, the interface defines the method signature (a method signature denotes the method name, its arguments and type, and the return type), like this: function publicMethod(arg1:String):Boolean. However, what actually goes on inside of the method is not the concern of the interface. That’s up to the implementation.

If you were enjoying the audio equipment analogy, you can think of this differentiation between interface and implementation as the difference between putting a 1/4-inch jack on a piece of gear, and the components and quality of material put into that jack. Not all 1/4-inch jacks are created equal; some are gold-plated while others are nickel-plated. Some will have high-quality wires soldered to it, others will be molded directly onto a circuit board. The implementation (materials and method of construction) is not under the jurisdiction of the interface (a jack that is 1/4-inch wide).

If you weren’t enjoying the audio equipment analogy, I apologize for bringing it up again.


Step 4: Interfaces in Code

As it happens, I’m not bringing up all of this just to tell you that your objects already have an interface. That’s important to realize, but what we’re after right now is another Object-Oriented Programming concept known as the interface. You can actually define an interface without defining the implementation. If you think about it, this is inherently what the interface is about. The interface merely defines what you can do with something, not how things get done.

Confused yet? If not, you’re not thinking about it hard enough! Just teasing, but I do not expect this to make complete sense at this point. Let’s move on to a simple, perhaps useless, but definitely hands-on example.


Step 5: Writing an Interface

Let’s crack open Flash and the text editor of your choice, and try our hand at creating an interface. Before we can really begin, create a folder on your computer in which to house this mini-project. It’ll just be tidier to have a dedicated project folder. All files that we create in this step will be saved in this folder.

Now, create a new .as file. I’ll assume you’re using an editor that doesn’t have much in the way of templates, but if you’re using Flash Builder, you can get most of this by choosing “ActionScript Interface” from the new file menu. And of course, many other editors have templates (even Flash CS5 has an ActionScript 3.0 Interface template). But it’s good to learn the nuts and bolts of these templates.

Save your file as “ITest.as” in the project folder. It’s not required, but it’s common practice to name your interfaces following the convention of naming classes (i.e., capital first letter, camel-case after that), with the addition of an “I” at the front. The “I” indicates that the datatype is an interface, rather than a regular class. Flash will happily work with interfaces that are named without the leading “I” but it’s a convention that you’ll find handy for your own projects, as well as useful when looking at other developers’ classes and interfaces.

Now, enter the following boiler plate code:

package {
    public interface ITest {

    }
}

You’ve just written an interface (one that doesn’t define much, but still). Note that if we wanted to utilize a package structure, we’d spell it out after the package keyword just like in classes. And except for the use of interface, the definition is identical to a class definition. However, note that we don’t put in a constructor. The constructor is a special method, and isn’t really part of an interface. Any other method, though, we can define in the interface, and we’ll do that next. Add the highlighted line to your interface file:

package {
    public interface ITest {
        function test():void;
    }
}

Now, we’ve declared that the ITest interface has one public method. It’s called test, takes no arguments, and returns nothing. What does it do? The interface isn’t terribly concerned with that. What it does will be up to the concrete implementation. Notice that the method signature ends with a semi-colon, and not curly braces.

Also notice the lack of public or private or anything in front of the function. The exceptionally quick-witted will recall that omitting the access modifier in a class will default to internal. Since interfaces define public methods only, the default is public. In fact, even trying to specify public will cause errors.

Save your file, and your interface is now usable. We’ll use it in just a moment.


Step 6: But First, a Quick Summary

To put the previous hands-on instruction into theory, the mechanics of an interface in OOP is rather similar to a class:

  • An interface is defined in its own text (.as) file, just like a class.
  • The boiler plate code is nearly identical to that of a class file; you use pacakges and imports as needed.
  • The name of the interface must be the same as the base name of the file.
  • The interface is a datatype, just like a class.

There are, as you’d expect, differences. The biggest difference is this:

Interfaces do not have any functionality.

There are other differences, some of which we haven’t touched on yet:

  • In the boiler plate, you use the keyword interface instead of class
  • You can define public methods only
    • This does include implicit setters and getters — e.g., function get someString():String
    • This does not include private, protected, or internal methods.
    • This does not include properties of any kind.
  • When defining these public methods, you do not use the public keyword.
    • Not only is public assumed, it’s actually non-compilable code to use that keyword in the method signature.
  • Seeing as how there is no functionality, you end the method declaration with a semi-colon, and omit the curly braces that normally
    wrap around the method implementation.

Step 7: Implementing an Interface

It’s not enough to simply define an interface; the interface needs to be implemented in order to be useful. What implements an interface? A class, naturally. Any class you write can technically implement any interface you choose. We’ll take a look at how this works in this step.

This class is often called the “implementation” when referred to in relation to the interface. It may also be called a “concrete” class; as in, it’s something “solid” and “real” as opposed to the non-functional interface.

Create a new text file called “TestImplementation.as” and save it into the project folder. It will be a class, so add the following basic class skeleton:

package {
    public class TestImplementation {
        public function TestImplementation() {
        }
    }
}

So far, nothing new or even exciting. It’s just a class. It has no connection to the ITest interface we created in the last step. But obviously we want to utilize that interface, so here’s what we need to do: add implements ITest after the class name:

package {
    public class TestImplementation implements ITest {
        public function TestImplementation() {
        }
    }
}

With this addition, we have now declared that our class TestImplementation will implement the ITest interface. But all we’ve done is declare that intention. We need to actually do the implementing. Add the test method declared by ITest to our TestImplementation class:

package {
    public class TestImplementation implements ITest {
        public function TestImplementation() {
        }

        public function test():void {
            trace("Just a little test.");
        }
    }
}

At this point, our class now fully implements the ITest interface. Our next step is to see this class in action.


Step 8: Testing the Interface and Implementation

Create an ActionScript 3.0 Flash file (File > New > ActionScript 3.0), and save it as “first-interface.fla” in your project folder.

Create one more text file, called “Main.as”, in your project folder. This will be our document class. Before writing the contents of the class, hop back to your Flash file and enter “Main” as the Document Class in the Properties panel for the document.

Now, in Main.as, enter the following:

package {
    import flash.display.Sprite;

    public class Main extends Sprite {
        public function Main() {
            var tester:TestImplementation = new TestImplementation();
            tester.test();
        }
    }
}

This is an unsurprising usage of our TestImplementation class. We create a new instance of it, then call a method on it, resulting in a trace in the Output panel.

The result of running the test-interface FLA

This finished project is available in the download package in the “first-interface” folder.

Now, let’s explore the relationship between interface and implementation.


Step 9: The Contract

When you write implements in your class file, it’s like you’re signing a contract with Flash, agreeing to fully implement each method defined in the interface file. When Flash sees that implements keyword, it will do quite a bit to ensure that you do, in fact, implement the interface.

Let’s start with some modifications to the interface. Open up ITest.as and, first, let’s add a method to it:

package {
    public interface ITest {
        function test():void;
        function anotherTest():void;
    }
}

When we make this change, we’re saying that any implementations of this interface must define these two methods. But, before we do that, go ahead an test the movie right now. You should see that we get compiler errors:

[...]/TestImplementation.as, Line 2 1044: Interface method anotherTest in namespace ITest not implemented by class TestImplementation.

That error says, in rather stilted computer jargon, that we have failed to uphold the contract that we’ve entered. We said we’d implement the ITest interface, yet we never implemented the anotherTest method.

Let’s try to fix that problem. Back in TestImplementation.as, add the method in question, but we’ll deliberately make a mistake for illustrative purposes:

package {
    public class TestImplementation implements ITest {
        public function TestImplementation() {
        }

        public function test():void {
            trace("Just a little test.");
        }

        public function anotherTest(input:String):void {
            trace("Another test: " + input);
        }
    }
}

If you run the movie now, you’ll get a different compiler error. That means that we’ve solved the previous error at least, but not to the satisfaction of the Flash compiler. It is now complaining that:

[...]/TestImplementation.as, Line 2 1144: Interface method anotherTest in namespace ITest is implemented with an incompatible signature in class TestImplementation.

This is due to the use of the input argument in our implementation of the anotherTest method. It’s not declared in the interface, therefore we have an “incompatible signature.” If you clean that up:

public function anotherTest():void {
    trace("Another test");
}

You’ll see that we can now compile successfully. The lesson here is that interfaces are rather strict. Once you say you’ll implement one, you’re bound by that contract to implement each method exactly as declared by the interface. Not doing so means your SWF will not run due to compiler errors.


Step 10: The Limits of the Contract

[...]

Read more: AS3 101: OOP – Introduction to Interfaces

Wednesday, April 13, 2011

What Creative Suite 5.5 brings to game developers

Building games for mobile devices with various operation systems is one of the biggest challenges for developers. Creative Suite 5.5 makes it easier and allows you to deploy games that run across Android, BlackBerry Tablet OS and iOS. You can also test your game with different resolutions and DPIs using device profiles in Flash Builder. In Flash Pro, you can rescale content to any screen-size just by ticking one check-box and so on…

Visual

So what CS5.5 brings to you are not only new export options, but there is tooling that is tight to mobile publishing and helps you to do things faster.

Let’s have a look what CS5.5 brings you and how it makes your life easier.

Deploy to web, desktop and mobile
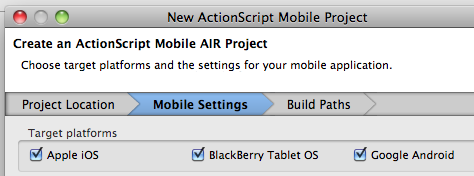
Mobile porting has never been easier. Choose among iOS, Android and BlackBerry Tablet OS or all of them.
Deploy to iOS, Android and BlackBerry Tablet OS

Export as Bitmap for better performance
Next to Cache as bitmap you can now convert your vector artwork directly to bitmap right in Flash CS5.5 IDE during export. The good thing is, that you still work with the artwork as with vector, but once you export the SWF, it’s converted to bitmap. Tweening bitmaps is less CPU demanding than vectors and your app will perform better. Unlike Cache as bitmap, you can rotate and scale the artwork during runtime without having it re-cached – so that’s why Export as Bitmap might work better you. Cache as bitmap is good choice, but only if you change positions – if you start rotating and scaling – it will re-cache every change – although this can be solved with cacheAsBitmapMatrix on mobile platforms, Export as Bitmap is another very useful option to consider[...]

Read more: What Creative Suite 5.5 brings to game developers

Monday, April 11, 2011

Euclidean Vectors in Flash

Euclidean vectors are objects in geometry with certain properties that are very useful for developing games. They can be seen as points, but they also have a magnitude and a direction. They are represented as arrows going from the initial point to the final point, and that’s how we will draw them in this article.

Euclidean vectors are commonly used in mathematics and physics for a lot of things: they can represent velocity, acceleration and forces in physics, or help prove a lot of important theorems in mathematics. In this tutorial, you’ll learn about Euclidean vectors, and build a class that you can use in your own Flash projects.

Please note that Euclidean vectors are different than ActionScript’s Vector class, and also different than vector drawing.

Vectors can be used in the Flash environment to help you achieve complex tasks that would otherwise require a lot of effort if done without them. In this article you will learn how to use them in Flash, as well as learn a lot of cool tricks with vectors.


Step 1: Cartesian Coordinates and Flash’s Coordinates

Before jumping into vectors, let’s introduce Flash’s coordinate system. You are probably familiar with the Cartesian coordinate system (even if you don’t know it by name):

Flash math vectors in AS3

Flash’s system is very similar. The only difference is that the y-axis is upside-down:

Flash math vectors in AS3

When we start working with vectors in flash, we need to remember that. However, good news: this different system doesn’t make much difference. Working with vectors in it will be basically like working with vectors in the Cartesian system.


Step 2: Defining a Vector

For the purpose of this tutorial, we will define and work with all vectors’ initial points as being the registration point of the stage, just as they are commonly used in mathematics. A vector will then be defined just like a common point, but it will have magnitude and angle properties. Take a look at some example vectors defined in the stage:

Flash math vectors in AS3

As you can see, a vector is represented by an arrow, and each vector has a certain length (or magnitude) and points along a certain angle. The tail of each vector is at the registration point (0, 0).

We will create a simple EuclideanVector class for this tutorial, using the Point class to hold the vector’s coordinates. Let’s create the basic vector class now:

package
{
 import flash.geom.Point;

 public class EuclideanVector
 {
  public var position:Point;
  public var magnitude:Number;
  public var angle:Number;

  public function EuclideanVector(endPoint:Point)
  {
   position = endPoint;
  }
 }
}

During this tutorial, we will talk about the sense and the direction of a vector. Note that the direction just defines a line that “contains” the vector. The sense is what defines which way the vector points along this line.


Step 3: Inverse of a Vector

In this tutorial we will use the expression “inverse of a vector”. The inverse of a vector is another vector with the same magnitude and direction, but a contrary sense. That translates to a vector with the opposite signal of the first vector’s coordinates. So a vector with an endpoint of (x, y) would have an inverse vector with an endpoint of (-x, -y).

Flash math vectors in AS3

Let’s add a function to our EuclideanVector class to return the inverse vector:

public function inverse():EuclideanVector
{
 return new EuclideanVector(new Point(-position.x, -position.y));
}

Step 4: Basic Operations Addition


Read more: Euclidean Vectors in Flash

Beginners OOP & Design Patterns in ActionScript 3.0 Post 2: Code Organizer

OOP and DP: Not For Speed
The very first thing to learn about OOP and Design Patterns is that they were not intended to optimize program speed or even efficiency. They were developed to increase programmer efficiency and cut back on wasteful wheel re-invention. They help organize your code so that you can accomplish more and [...]

Read more: Beginners OOP & Design Patterns in ActionScript 3.0 Post 2: Code Organizer

Sneak Peek of Future of the Flash Runtime!

Future of the Flash Runtime
For those who have missed this, Arno Gourdol, leading the Flash Runtime engineering team presented a session at Flash Camp Brasil last week entitled, Future of the Flash Runtime. Arno unveiled some very cool features we are working on right now, and I wanted to make sure you guys know about those in case you did not luckily attend Arno's session.

If you are curious about the slides, you can download them here.

Here are some of the features we are working on :

- Faster GC : GC hint API and more.
- New numeric types : float and float4 (very useful for Molehill in the future).
- Concurrency : Worker threads (shared nothing model) to leverage multicore CPU's. No more UI 's blocked when doing expensive operations.
- Stage3D : The API used for Molehill (that you know through the Incubator builds).
- StageVideo : Allowing full GPU acceleration (decoding + blitting) when used with H.264. Part of Flash Player 10.2 and coming to AIR soon.
- Threaded video pipeline : Will decode non H.264 streams on another thread, Net I/O will also be moved to another thread, all this bringing smoother playback.

I will be covering some of those in more details later on, stay tuned! :)

Read more: Sneak Peek of Future of the Flash Runtime!

Fake Functions

Today’s article is about a hack. It’s a hack dedicated to improving the performance of helper functions, nested or not. you may not like the way the code looks, but you’ll love the speed! Arguably the cleanest way to implement a helper function for a complex function is to next that helper function inside of [...]

Read more: Fake Functions

Sunday, April 10, 2011

New MinimalComps Site, and Github

New MinimalComps Site, and Github: "

During JavaScript month, there was little time for much else. There were bugs and issues in MinimalComps that had piled up and I was ignoring them. So yesterday I sat down and went through the whole lot. I realized that several were not bugs, but simply known issues with known workaround, such as the need to add the flex.swc to your project if compiling in Flash CS4/5. The current site had no easy place to put this stuff. I could have worked more on the site to make it more dynamic, but wound up installing WordPress and a nice minimal theme. I’ve been working on it on and off over the weekend, adding a gallery, showcase, FAQ, etc. The site is at the same old place:

http://www.minimalcomps.com

And if you need to see the old site for any reason, it’s now at:

http://www.minimalcomps.com/oldsite

I’ve also been toying with the idea of moving the source over to github. I’ve been on a project with a client that uses git and finally got very familiar with it. I had many people begging me to use it for the comps. I pretty much decided on it a few weeks back, but wanted to straighten out this other stuff first.

So as of yesterday, the official MinimalComps repository is at:

https://github.com/minimalcomps/minimalcomps

As of this moment, what’s there is identical with what’s on Google Code, but you should consider the Google Code site dead. I’m not going to update it there any more, and will eventually pull it down.

One of the pages on the new site is the Showcase, with links to sites and projects using MinimalComps. You can see it here, and feel free to add your own links to any projects in the comments.

http://www.minimalcomps.com/?page_id=16

"

Friday, April 8, 2011

How the ActionScript Virtual Machine Works

How the ActionScript Virtual Machine Works:

If you are involved with AS3 development you might have heard of a virtual machine that lives inside the Flash Player or of the so-called bytecode that your code gets transformed into. But what are they exactly?

A significant part of the Flash Player is the AVM – the ActionScript Virtual Machine. When you compile your AS3 code it gets transformed into a binary instruction set, called bytecode, which is embedded into the produced SWF. As a user loads the SWF into the Flash Player, the AVM parses the bytecode and executes it step by step.

Let’s examine the process in a little bit more detail: Have a look at the following statement and imagine we want to execute it (compute the result and assign it to “foo”):

foo = 2 + 3 * 4;

From a human’s point of view this line means “Multiply 3 by 4, add 2 to the result and assign that to a variable named foo”.

On the other hand if a computer reads this line it would store it as “character f, followed by character o, followed by character o, followed by character space, followed by character equals, followed by….” And so on. At this state this information is pretty useless and additional steps need to be taken in order to turn the statement into something that a machine can execute. Basically what we need to do is to compile the source code.


The Compiler

As I noted before, the statement above is raw source code, a collection of characters that mean nothing to a computer. In order to obtain useful information we have to run the code through a few procedures. First, we should turn the stream of characters into words and second, turn the words into sentences.

The first step of turning the characters into words is done by a tokenizer which basically performs lexical analysis of the source code. It runs over the characters and groups them into series of “tokens” (and it also determines their type – identifiers, operators, constants…). After the tokenizer (it’s also called a lexer BTW) finishes its job, we get an array which can be illustrated like this:

[Identifier foo][Operator equals][Integer 2][Operator plus][Integer 3][Operator multiply][Integer 4]

This is a higher level structure that contains “words” instead of the raw characters.

The resulting tokens are fed into a parser. It performs semantic analysis of the tokens and assembles them into machine instructions. In simpler words, it constructs sentences out of the words (tokens) and makes sense out of them (i.e. compiles instructions out of them). For instance if the parser is given a statement 2 + 3; i++; as tokens the parser must first separate the tokens into “sentences” (2 + 3 and i++) and then actually understand them (the first is add operation and second is an increment). After we understand the instruction we can actually compile instructions to the machine out of the input.

After the parsing the tokens of our string we get the following instructions:

push 2
push 3
push 4
multiply
add
assign "foo"

These are instructions that a computer can execute. Compress it to a binary format and you’ve got bytecode. Bytecode is a list of instructions that a machine is very good at processing and when processed in order yield the desired results.


The Interpreter

After we compiled the source code to bytecode we can execute it with a virtual machine. The VM is software that executes the bytecode one instruction at a time, so let’s just walk through the interpretation of our statement:

  1. push 2 — The command is to push the number 2 into the stack. The VM maintains a stack during execution which the commands can operate on, that is to push into and pop off values (http://en.wikipedia.org/wiki/Stack_(data_structure)). Currently the stack looks like this : [2]
  2. push 3 — push another integer into the stack. Now it looks like [2, 3];
  3. push 4 — push yet another integer into the stack. Now it looks like [2, 3, 4];
  4. multiply — this command pops 2 values off the stack, multiplies them and pushes the result back to the stack. It pops the values 3 and 4 (which are currently on the top of the stack), multiplies them and pushes the resulting 12 to the stack. It affects the stack to look like [2, 12];
  5. add — you’ve probably guessed it: The command pop 12 and 2 off the stack, adds them and pushes the resulting 14 into the stack. Now only 14 remains inside the stack.
  6. assign 'foo' — This command pops a value off the stack and assign it to a variable named foo. So now the variable foo contains value of 14 and the stack is empty.

That’s it! This is an example of an extremely simple statement executed of an extremely simple virtual machine. Let’s examine a slightly more complicated example: [...]

Bit Battalion: The Art of Level Design

Bit Battalion: The Art of Level Design:

Of all of my time spent on Mr Runner there is one thing which takes up most of my time – designing the levels.  I’d like to share a few lessons I’ve learned about level design that I think are really valuable.

1. Work out the feel of your game

Sounds simple, but its not. Mr Runner isn’t just a platfomer, it’s about conserving speed and momentum. Super Meat Boy is about very precise death-evasion. Knytt stories is about exploring. These are all platformers that have very different feels.
It’s important that you get a feel for your own game. When you work it out, this feel will be the root of all your levels. You’ll keep asking your self, does this level feel the way I want it to? For example, every level in mr runner you can do quickly by conserving momentum.

2. Only design levels that fit that feel

When I opened up Mr Runner 1 to the public, I let them design their own levels. Of these, only a handful were fun. This is because Mr Runner requires a very specific style of controls.

In Mr Runner, the controls are designed to be fun when you jump large distances, conserve momentum, time jumps perfectly, make big wall jumps. They aren’t designed to deal with very precise movements in small areas, stopping and starting, or waiting. The level design had to reflect this. It was never cramped, never required anything to finicky, and instead included large flowing movements that let you keep up your speed.

Put more simply, the game was never difficult because the controls were difficult. At all times, the player should feel as though it’s their fault they died, and this is almost entirely up to level design.

3. Every level has a unique theme

Its no secret that I’m a huge fan of Super Meat Boy, I have A+ the entire game and died more that 22000 times. Part of the reason that I love it so much is that every level is different while maintaining the same feel. Every level has something specific that the player has to do or learn, and no two levels look the same. Each level has a “theme”.

Now take a game like League of Evil, which claims to be the “Super Meat Boy” of the iPhone. I thought it was fun, don’t get me wrong. That being said there are 60 levels and it’s almost impossible to tell them apart. They use the same mechanics in the same way, with slightly different level lay outs – now you have to go Left, not right!

4. Keep it interesting

The player should always feel like they are progressing through the game. One of the biggest mistakes you can make when trying to achieve this, is to throw in a whole lot of levels without introducing any new mechanics.

In Mr Runner 2, I introduce three new mechanics over the 15 levels of each world and in the first world I introduce even more. Players will never have to sit through more than a few levels before they are faced with something that challenges them in a new and interesting way. Typically once a player feels like they’ve experienced all a game has to offer, there is very little incentive to keep playing. If the first level has all they’ll ever see – their patience will wear thin.

5. The WOW factor

There should be at least one bit in every level which makes the player feel awesome. A bit where they literally say outloud “that was cool”, even if no one is around to hear. The bit they want to tell their friends about. The bit they feel like a bad ass for surviving.

Let me give you some examples from Mr Runner: it’s when you first do a slide, when you fall really far and the screen begins to shake with speed, when you’re tossed and miss some spikes by a hairs breadth, when you boost for the first time. If you can’t fit a “wow” moment into every level, at least reward the player every few levels – thats why they’re sticking in there.

6. You are not your players

[...]

Thursday, April 7, 2011

SWFToPNG

SWFToPNG:

SWFToPNG is a tool to export Flash assets to PNG. It automatically renders out the symbols in a SWF to a series of PNG files, and optionally crops out the transparent bits around the edges as well as retaining the registration points of the items.

Some useful information:

  • This only works with AVM2 SWFs, so that’s Flash 9 player and higher with AS3
  • It will only understand MovieClips on the timeline (no buttons!) and they must be exported for ActionScript for the filenames to be correct (this is easy enough to do with a few clicks in the Flash IDE).
  • The program is memory-intensive. A bitmap is created for each frame of the SWF and held in memory until the files have been written (it was designed this way to facilitate cropping and quick development; it’s not intended as an export utility for your ten minute animations!)
  • Timeline code that causes clips to loop infinitely will also cause the rendering to loop infinitely.

[Literature] Game Balance ch6 - Situational balance

[Literature] Game Balance ch6 - Situational balance:

My notes from course 6 of the Game Balance class of Summer 2010, by Ian Schreiber.

If 10% of monsters are dragons, 'double dmg to dragons' = 10% * 2dmg + 90% * 1dmg = 1.1dmg overall.
Situational balance = depends on the situation in the game; the cost is fixed cost, but the value changes depending on the situation. Ex: in DND, if atk + 1d20 >= AC then hit. Is +1atk (for player) balanced with +1def (for my opponent)?

  • yes if 1 vs 1 (+1 on each side)
  • no if enemies attack more often than player (because player will roll more often on AC than on atk) (eg 4 trash mobs vs one player)
  • no if player(s) attack(s) more often than enemies (more rolls on player's atk) (eg player group vs boss)

=> Level design tip: player should be outnumbered half of the time, and outnumber the enemies half of the time if atk and def have the same cost and value. This adds replay value ("I could start a new game with 20atk/80def instead of 50atk/50def")

Versatility

In FPS, players usually have a close+strong+fast, a far+strong+slow and a far+weak+fast weapon. If player can switch weapons quickly, then it's as if the player had all of them at once. The overall price becomes the sum of all of these weapons, they should not be balanced individually.

A character/weapon is more versatile if it is able to handle more situations (Swiss-army knife). Examples:

  • RTS: archer very strong against flying creatures and very weak against footmen. If wizard is (a bit) strong against flying AND footmen, wizard is more versatile than archer.
  • FPS: knife = good in tight rooms VS snipers = good in large open-spaces VS machine gun = average on any map (= versatile weapon). Machine gun is the most valuable choice for players when they do not know which map is going to be played.

Solution against versatility: cost for switching can be time (it takes 5s to switch weapons), money, frequent weapon reload, etc. If switching is free, then player accumulates everything and uses each tool when he needs it. If inventory is limited, player will look for optimizations (eg only get fire and wind swords if you can only get 2 swords of the 4 elements). Balance depends on how fast player should be receiving new items.

  • fast: price = constant (but player earns more and more as he progresses, so player gets swords quickly)
  • faster and faster: 'Since you’re such a good customer, you can have a 10% discount on all future swords.'
  • slow: prices increase

Two kinds of versatility: [...]

Tuesday, April 5, 2011

User stories, pseudocode and agile development

User stories, pseudocode and agile development:

The first steps of a project are always the most amazing because it’s when we start to understand customer needs and when the first top-level analysis is done.

The output of these steps usually is a bunch of top-level stories, a clear vision about the goals of the project and plan driven by customer priorities. This is usually just enough to start the development life cycle of the application.

The first question every application development effort faces is “Where to start?”.

Flash Game Dev Tip #8 – Building a Shoot-em-up Part 3 – Return Fire

Flash Game Dev Tip #8 – Building a Shoot-em-up Part 3 – Return Fire:

Flash Game Dev Tips logo

Tip #8 – Flixel – Building a Shoot-em-up, Part 3 – Return Fire

This tip follows-on from Tip #4, where we added enemies and explosions into our game. But it was a little one-sided. This time the enemy are going to shoot back. And you’ll feel it, by way of a health bar and set of lives in our new HUD. Finally we’ll drop in the scrolling tile-map background and simple menu / game-over states. By the end it will look like this:

Scrolling tile-map background and simple menu and game-over states

Note: I’ve embedded the game at the bottom of the tip.

Return Fire

Last time we added the Enemy Manager, which spawned a regular supply of enemies at us. Each enemy had a launch function which set it moving. Let’s add the ability to fire to that:

// Will they shoot at the player? 70% chance of doing so
if (FlxMath.chanceRoll(70))
{
 willFire = true;
 fireTime = new FlxDelay(1000 + int(Math.random() * 500));
 fireTime.start();
}

This uses a new FlxMath function chanceRoll. The enemy has a 70% chance of firing at you. If this happens we create a new FlxDelay Timer of 1 second + up to an extra 0.5 second, and start it running.

Then in the Enemy update function we check that timer:

if (willFire && fireTime.hasExpired)
{
 Registry.enemyBullets.fire(x, y);
 willFire = false;
}

As you can see, this is calling the fire function in our Enemy Bullet Manager, passing in the x/y coordinates of the Enemy, which launches a bullet from the bullet pool:

public function fire(bx:int, by:int):void
{
 x = bx;
 y = by;
 FlxVelocity.moveTowardsObject(this, Registry.player, speed);
 exists = true;
}

FlxVelocity tells the bullet (this) to move towards the player at the value of speed (which in our case is 240 pixels per second).

Pixel Perfect Collision

If you are unlucky enough to be hit by our new enemy bullets then we need to damage your health.

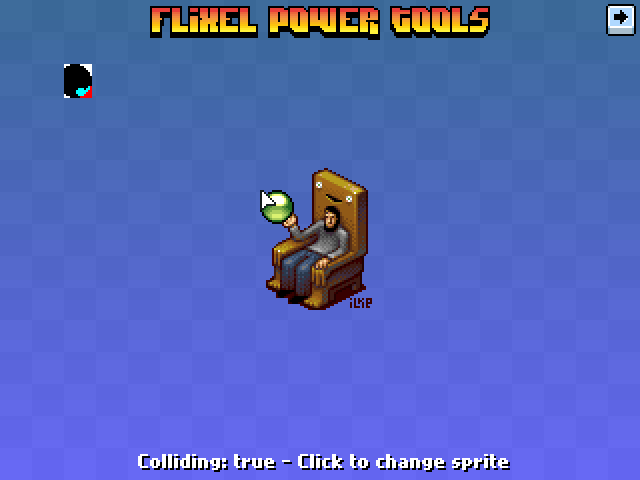
Previously the game used native flixel collision, which is based on bounding-boxes (i.e. the rectangle that encloses your sprite). This isn’t desirable in a shoot-em-up. It meant the player could get shot without the enemy bullet even visually touching him. To address this we simply add one check into our bulletHitPlayer function [...]

FlxHealthBar added to Flixel Power Tools

FlxHealthBar added to Flixel Power Tools:

FlxHealthBar

Health bars are a commonly used feature in games. From little health bars floating over players / enemies heads, to bars in the UI / HUD. This class provides a really fast way to create them, and they are highly customisable. It features:

  • 3 different types of bar: Plain-colour filled, Gradient filled or Image filled
  • All fill types support alpha levels
  • Optional 1px border around the bar with configurable colour
  • The bar can fill in one of 3 directions: From left to right, right to left or from the inside out
  • Bars are associated with FlxSprites (its parent). When the health value of the parent changes, the bar updates automatically (within a given threshold limit)
  • Bar can be fixed on-screen, and supports scrollFactor
  • Bar can “float” with its parent at a given x/y offset from the parents origin
//  Create a tiny 32x4 health bar that floats above the 'wolf' sprite
wolfHealth = new FlxHealthBar(wolf, 32, 4, 0, 100);
//  Tells it to track the x/y position of the wolf FlxSprite but offset by -5px on Y
wolfHealth.trackParent(0, -5);

Visit the Flixel Power Tools page to see it in action in the Test Suite, and find the svn download details.

Printing in Bulk with Flex

Printing in Bulk with Flex:

This casestudy demonstrates how to use PrintAdvancedDataGrid and a custom itemRenderer to print multiple pages of data and graphics, using the SWFloader component.


Final Result Preview

Let’s take a look at the final result we will be working towards – below is an overview of a 12 page PDF printed from a Flex application using the techniques in this article:


Demonstrated in This Tutorial:

  1. Using FlexPrintJob class.
  2. Using PrintAdvancedDataGrid.
  3. Creating a custom itemRenderer with a SWFLoader.
  4. Printing a header and footer.
  5. Filtering a collectionView.
  6. Printing a DataGrid with height that exceeds 7500.

Some Difficulties With Regards to Flex Printing:

  1. Your content or DataGrid rows must all be visible on the stage or they won’t print.
  2. Adding manual page breaks is difficult, and achieved through setting your rowHeight to match what you want displayed on each printed page.
  3. Flex printing goes haywire if your total PrintAdvancedDataGrid content height is greater than approximately 7500 pixels, necesitating a workaround of multiple PrintAdvancedDataGrids.

Step 1: Import the Printing Classes

Begin by importing the necessary print classes, as well as your print renderer into your Flex project:

import mx.printing.FlexPrintJob;
import mx.printing.FlexPrintJobScaleType;
import com.reiman.PrintItemRenderer;

Step 2: Create a View for PrintAdvancedDataGrid and itemRenderer

Create a view State for your bulk printing. In my case, I created a state called printState.

*alternatively, you can create an instance of your PrintAdvancedDataGrid and itemRenderer and add them to the stage via actionscript, but for a bulk printing project I found this to be too difficult to work with, and as I was trying to print SWFs that are XML driven, I needed to make sure that my SWFs were displaying correctly before printing.


Step 3: Add Your PrintAdvancedDataGrid

<mx:PrintAdvancedDataGrid
  paddingTop="0"
 paddingBottom="0"
 visible="true"
 rowHeight="200"
 sizeToPage="true"
 showHeaders="false"
 id="printGrid"
 creationComplete="stripQuiz();"
 height="{grid_height}"
 width="300">
<mx:columns>
<mx:AdvancedDataGridColumn
 width="200"
 id="printColumn"
 itemRenderer="com.reiman.PrintItemRenderer"
 sortable="false" />
</mx:columns>
</mx:PrintAdvancedDataGrid>

If you need a total printing area greater than 7500 in height, you’ll need another PrintAdvancedDataGrid for each area


Step 4: Set Your PrintAdvancedDataGrid options

One thing I found important was to set the option

sizetoPage="true"

According to the PrintDataGrid Control page from the Adobe Flex 3 LiveDocs, the sizeToPage property makes sure that the PrintAdvancedDataGrid control removes any partially visible or empty rows and to resize itself to include only complete rows in the current view.


Step 5: Add Your itemRenderer

Add an itemRenderer to your AdvancedDataGridColumn [...]

Monday, April 4, 2011

[Literature] Game Balance ch5 - The human-side of probabilities

[Literature] Game Balance ch5 - The human-side of probabilities:

My notes from course 5 of the Game Balance class of Summer 2010, by Ian Schreiber.

The more randomness in a game, the more casual it is: there are fewer strategic choices. Less randomness means more of the fate of the game lies in the player’s choices. That’s not always the case, though. Ex: TicTacToe has no randomness, but is not about skill. Other counter-example: a Poker hand is random, but there are skilled Poker players.
Skill dominates (over luck) if the player is rewarded for predicting and/or responding to the randomness. Ex: one can base his decision on probabilities in Poker, but not in Black Jack.
There is no skill in executing a difficult pattern that you’ve practiced (eg counting your hand or memorizing cards in BlackJack). Skill appears in planned, successful and unexpected decisions.
Luck can be carefully increased to even the playing field. Ex: headshots make it possible for weaker players to sometimes luckily kill better players. Head shooting is also a high-level skill. How much luck or skill a game should have depends on the target population: social games and kid games = luck, hardcore games = skill.
How to transform skill into luck:

  • replace player choices by dice rolls
  • throw less dices (so that there is no law of large numbers, hence less prediction)
  • increase the impact of random events on the game state
  • increase the range of randomness (like changing a d6 roll to a d20 roll)

Human biases

Humans tend to remember things that happen the least often, or forget those who are unpleasant (eg match loss), hence they tend to overestimate their level. Humans have a flawed understanding of probabilities, hence showing the actual probabilities will actually make them feel like something is wrong/broken. Here are a bunch of biases humans are subject to:

selection bias improbable but memorable events are seen as more likely than they really are
self-serving bias 'unlikely' (5%) is interpreted as 'nearly impossible' (0.01%) when the odds are in your favor. However, 'unlikely' (5%) is interpreted as 'possible' (30%) when the odds are not in your favor.
attribution bias positive random result is assumed to be because of a player’s skill, negative random result is assumed to be bad luck/cheating
anchoring over-evaluation of the first/biggest number seen. Ex: losing 2/3 of the trials is not as bad as losing 20/10 of the trials. Consequence: small base dmg but high bonus dmg = player likely to underestimate.
gambler's fallacy assumption that a string of identical results reduces the chance the string will continue
hot-hand fallacy assumption that a string of identical results increases the chance the string will continue

Ethics

Dishonest game design = make the players believe they are very likely to win. It increases excitement and anticipation of hitting a jackpot. Hence it keeps them engaged. Ex: dishonest car dealership: show VERY big prices first to anchor the customer, then show 'normal' big prices: they look like small prices.
Honest game design = tell the player one thing, but actually do something else. Examples: [...]

How To Rotate A Cube In 3D With Matrix

How To Rotate A Cube In 3D With Matrix:

Another simple trick to avoid locks when rotating objects in 3D.

Goal: rotate a cube in all axes and avoid axes to switch.

See the problem in a video:

1. Consider following scenario (WRONG):

Demo | Full source code

protected function init():void{
 box = new Box(200,200,200,2,2,2);
 box.setMaterialToAllFaces(new FillMaterial(0xFF0000,1,1));;
}
 
protected function onMouseMove(event:MouseEvent):void{
 if(!isDragging)
  return;
 
 var deltaX:int = lastX - event.stageX;
 var deltaY:int = lastY - event.stageY;
 
 lastX = event.stageX;
 lastY = event.stageY;
 
// IMPORTANT PART
 box.rotationZ += deltaX*Math.PI/180;
 box.rotationY += deltaY*Math.PI/180;
 
 camera.render();
}

When you use rotationZ and rotationY together you will find that by rotating the cube you switch axes and at the end you rotate different axes than you wanted at the beginning.

2. Solution: rotate with Matrix

Demo | Full source code

[...]

Everything You Could Possibly Want to Know About Import Statements*

Everything You Could Possibly Want to Know About Import Statements*:

* Not really everything.


Imports Are Required**

In the AS2 days, you could get around having to write an import statement by simply using the fully-qualified class name within the class body (such as flash.display.Sprite as opposed to just Sprite). While you are welcome to use the fully-qualified class name as you write your code, import statements for each class are required in AS3.

So there’s not a whole lot of need to write fully-qualified class names, unless you happen to use two classes that share the same short name within the same class — perhaps if you are using Flash’s Camera class along with a 3D library’s Camera class.


** Unless the Class is in the Same Package

The exception to the previous rule is if the class you are using and the class you are writing are both in the same package. All classes in a package are implicitly available to each other, without an import statement.

It’s still not a bad idea to write the import statement anyway, because:


Import Statements Are Self-Documenting Code

By listing all of your imports, you create a sort of manifest of what other classes your class relies on in order to do its job. It may seem like a trivial thing, but this information can actually be quite useful. Consider the following class***:

package com.activetuts {
    import com.activetuts.SuperTrace;
    import com.activetuts.ActiveTween;
    public class QuickTip {
        public function QuickTip {
            var tracer:SuperTrace = new SuperTrace();
            tracer.log("Quick Tip");
            var tween:ActiveTween = new ActiveTween();
            tween.go();
        }
    }
}

*** Hopefully it’s obvious that this class is illustrative, not functional.

If you then use this QuickTip class, Flash will automatically make sure that the SuperTrace and ActiveTween classes are also compiled into the resulting SWF, because you used QuickTip, and QuickTip requires these classes.

Simple enough, but now consider more realistic classes which use dozens of other classes. If you need to know which classes are in use, a quick look at the import section can give you a decent idea. It’s not exhaustive, and it’s a little misleading even, but you’ll be hard-pressed to find someone who thinks that self-documenting code is a bad thing.


flash Classes Need Importing, But Are Not Compiled

There is a common misconception around the idea that using lots of classes necessarily means the file size of your SWF will increase. Normally, that’s true. But any class that starts with flash is one provided by the Flash Player, and will not have any effect on the size of your SWF. The byte code for, say, Sprite is contained in the Flash Player, and you’re simply registering the fact that you will use a Sprite, not bundling that byte code into your SWF. This is kind of the point of having the Flash Player.

I don’t expect you to believe me on this. I expect you to be slightly incredulous, and demand proof. I welcome you to prove this to yourself, by following these steps:

  1. Create a new FLA and associated document class.
  2. In the document class, write the minimum you need to actually define it as a document class:

    package {
        import flash.display.Sprite;
        public class Document extends Sprite {
            public function Document() {
            }
        }
    }
    
  3. Open up the Publish Settings by pressing Option-Shift-F12 / Alt-Shift-F12 (or by choosing File > Publish Settings…).
  4. Click on the “Flash” tab.
  5. In the “Advanced” section, check the “Generate size report” option.
  6. Also, in the “SWF Settings” section, check the “Export SWC” option, an uncheck the “Include XMP metadata” option (this last option removes a bunch of metadata from the SWF that inflates the size of the SWF and also make a mess of the size report we’ll be looking at) [...]

Constructing Arrays

Constructing Arrays:

In AS3, you can create an Array can be created with special syntax: myArray = []. You can even fill the Array with values all in one go: myArray = [1,2,3,4,5]. This is a nice shorthand that saves some typing compared to using the constructor: myArray = new Array(1,2,3,4,5). But, which way is faster? Today [...]

AS3: converting XML to JSON object

AS3: converting XML to JSON object:

I'm absolutely sure that you are using external data in your flash/flex applications. It is a good practice to transfer information in XML format. Most of the projects that I'm working on also use XML and in most of them I have a class that converts the data to JSON object. The problem with this workflow is that the parser's logic is always different because the XML is different. These days I wrote a class that solved this problem and directly converted every given XML file to a JSON object [...]

RSA Security Hacked By Adobe Flash Exploit

RSA Security Hacked By Adobe Flash Exploit:

If you haven’t heard already security buff RSA was hacked through an unpatched exploit in the Adobe Flash Player application. RSA specializes directly in internet technology and business security, with their biggest resource attributed to the SecurID platform. RSA also manages a large “fraud center” which offers leading news and information on protecting both your business and personal lifestyle from serious identity theft.

Adobe Exploit Identified In Microsoft Excel Document

RSA identified in a public statement that the hackers gained access by sending out a batch e-mail to a group of employees that contained attached Microsoft Excel format spreadsheets. The spreadsheet, disguised as a company wide e-mail labeled “2011 Recruitment Plan.xls”, was unfortunately opened by one of the employees. At the time the e-mail was opened, the Excel spreadsheet contained an inclusion known as the “zero-day” exploit, which took advantage of an invulnerability in Adobe’s Flash Player application.

Using a hacker’s version of a remote administration tool (RAT) the deviants then collected important data and information from the employee’s computer (passwords, user-names, sensitive information, etc.) and stored the collected data on an external server they owned and controlled.

RSA SecurID ProgramApparently the target of the attack was a series of data files related to RSA’s SecurID application. SecurID uses two-factor authentication support (passwords and pins, and authenticator IDs) to ensure more enhanced system security, which basically makes hacking a system protected with the software an increasingly difficult process. Obviously the hackers were looking to create a more evident strain of exploits and vulnerabilities in the SecurID software with the collected data and information.
How RSA Handled The Adobe Exploit

A week before RSA announced the security problems to the public (Thursday, March 17) Adobe released a public announcement to reveal the exploit.

Adobe Flash Logo
The Adobe announcement, made on March 14, stated that, “there are reports that this vulnerability is being exploited in the wild in targeted attacks via a Flash (.swf) file embedded in a Microsoft Excel (.xls) file delivered as an e-mail attachment.”

On March 14 it was not clearly evident to the public how serious the exploit really was, nor was it evident that RSA had actually been the target.

Adobe promised that it would release a serious update to patch the exploit, and kept it’s word after releasing an “out-of-cycle” unscheduled update on March 21.

Security issues and bugs are more common than the general public would like to think. As nothing in this world is perfect, technology is no exception to the rule. In the case of such an exploit no one is at fault, neither Adobe nor RSA; unless the flaw isn’t patched safely and securely in a timely manner (which it most certainly was).

Interestingly enough on March 17 an MSRC (Microsoft Security Response Center) manager and security engineer announced in a public blog post that Excel 2010 suffered no such security flaws. Excel 2010 uses DEP (Data Execution Protection) to protect the program from external security attacks, which means the RSA employee who opened the excel document was using an outdated version of Excel [...]

Sunday, April 3, 2011

ActionScript 3.0 and Multithreading #1: Defining the Problem

ActionScript 3.0 and Multithreading #1: Defining the Problem:

Beginners Welcome: In case you were looking for the next installment of our new OOP/Design Patterns series for Beginners, this post may throw you. It’s not for OOP/DP beginners, but since it’s an introduction to multithreading, concurrent and parallel programming, it should be pretty clear. The materials are presented at a definitional level with a simple Factory Method pattern to illustrate a point. Fear not, though. Next week, we’ll return with Part II of the beginners OOP/DP series [...]

Saturday, April 2, 2011

Flash Game Dev Tip #7 – Introducing the Flixel Power Tools

Flash Game Dev Tip #7 – Introducing the Flixel Power Tools:

Flash Game Dev Tip #7

Tip #7 – Introducing the Flixel Power Tools

Quite frankly flixel is awesome. It allows me to rapidly build games. The sort of games I like playing (and therefore making!) While it does a lot for you it is lacking in a few key areas. After all it’s just a framework, and frameworks are meant to be built-upon.

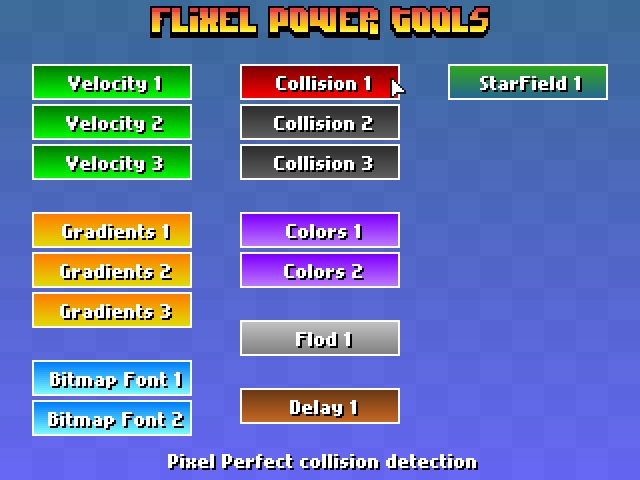
That is where the Flixel Power Tools come in! At the time of writing there are 13 new classes, all neatly arranged in a single package, that push flixel just that little bit further. There is also a test suite which include 16 easy-to-follow examples of the power tools in action, with a funky visual menu system and a way to actually see what they do. I always find it easier to learn by looking and then checking out the code!

Flixel power tools menu

The majority of these tools work without even touching the core flixel code-base. Although there are some that do require it, so with that in mind I’ve provided a fully Patched version of flixel 2.43. But if you’ve got your own build there are instructions on manually patching at the top of each class that needs it, and work-arounds should you not want to touch anything at all!

I will continue to expand the library of tools and the test suite. And of course keep them in-line with the way in which the flixel codebase is changing at the moment. For now here is a quick overview of what each new class offers:

FlxBitmapFont

Allows you to use bitmap fonts in your games very easily. It’s extremely fast. Fast-enough for real-time updates, or a GUI or HUD display. The rendered text is just a normal FlxSprite, so you can do with it whatever you like. Extensive character-set handling options and fully documented.

Flixel power tools fonts


font = new FlxBitmapFont(bluepinkFontPNG, 32, 32, FlxBitmapFont.TEXT_SET2, 10);
font.setText('easy :) ', true, 0, 8, FlxBitmapFont.ALIGN_CENTER);

FlxButtonPlus

Takes the FlxButton class you already know, and then pimps it out some! You can specify parameters for the callback, the button width, height and text in the constructor. Change the button text dynamically. Set hover-over and hover-out callbacks. And the default button style is now a nice gradient filled affair (which you can control the gradient colours of yourself). Or just use loadGraphic to replace it.


playback = new FlxButtonPlus(32, 32, toggleMusic, null, 'Play Music');

FlxCollision

Collision in flixel is handled with bounding boxes. Which is basically two rectangles colliding, and if they intersect you get a collision back. This class takes it the necessary step further and adds pixel perfect collision testing. Only the intersecting area is tested for speed. And you have control over the alpha tolerance level (so you can exclude pixels with an alpha level less than what you need). It also works with scaled, rotated or animated FlxSprites! and is perfectly fast enough to use in real-time.

Flixel power tools collision


if (FlxCollision.pixelPerfectCheck(player, spikes))
{
    // Player really did hit those spikes!
}

FlxColor

[...]

Friday, April 1, 2011

Intercepting when a YouTube video is finished

Intercepting when a YouTube video is finished:

I was using Actionscript 3.0 API for YouTube and I noticed that the documentation makes no reference to dispatch an event when the video comes at the end.
Deepening the thing, I realized that the event onStateChange can have the following values​​:

  • -1 ( unstarted )
  • 0 ( ended )
  • 1 ( playing)
  • 2 ( paused )
  • 3 ( buffering )
  • 5 ( video cued )

So at this point just to catch the event and if the onStateChange value is 0 (zero) then the video came at the end.

Example:

loader.content.addEventListener("onStateChange", onPlayerStateChange);

private function onPlayerStateChange(evt:Event):void
{
    var state:Number=(Object(evt).data);
    if(state==0)
    {
        trace("THE END");
    }
}

Batch Creation of SWFs Using DOS and the Flex Command Line Compiler

Batch Creation of SWFs Using DOS and the Flex Command Line Compiler:

Let’s look at bulk content creation. We’re going to use a DOS Batch file to quickly generate multiple SWFs containing different text, sound, images etc. but which follow a template defined by us.


I must admit, I am a SWF lover. You hear a lot these days about HTML5 and other emerging technologies that will somehow put the good old SWF out of business, but I will be one of those developers clinging to my beloved SWF for as long as I can. Over the past 14 years or so, the SWF has been unique in its ability to deliver rich media content over the web, way before any other technologies could come even close.

For elearning, the SWF is still pretty much the standard, and is something I use throughout all of my lesson content. I use it for everything from virtual tutor videos to vector images, vector text, and interactive activities of all kinds.

For doing bulk content creation, I’ve found that nothing works quite as quickly and powerfully as a good DOS Batch file. You can quickly write and modify a batch file to do all kinds of interesting things, and if you are working with a large amount of images, text, and audio, a batch file can quickly turn that into multimedia content in the form of a SWF.

Reasons you may like to do this include:

  1. You don’t have Flash installed on the PC where you are working
  2. You want to create SWFs in bulk
  3. You want to create SWFs from the command line

The only tool in Windows that you need other than your code editor is the Flex SDK, and optionally an open source ASCII to UTF-8 converting application called iconv from the GnuWin project, if you plan to use international characters or accent marks in your text.


Final Result Preview

Let’s take a look at the final result we will be working towards


Step 1: Determine Your SWF Type

Bulk creation means that all of your SWFs will follow the same template, so decide what kind of items you have a need for: vector text, image, audio, etc.


Step 2: Organize Assets and Fonts

Name your files appropriately: each text, image, and audio file should have matching names, as well as case. If your files are disorganized, you may want to download a file utility program to batch rename them, convert to lowercase, etc. One such program I found is called Useful File Utilities.

You may want to open a text file and keep a list of absolute paths to these items, including any fonts you plan to embed.

In the source/utility folder of your download for this tutorial, you’ll find some small batch scripts that can help you create a master wordlist to use with your SWF creation. If your file names contain more than one word, please use a dash between words [-]. Dashes are already accommodated for in my main .bat file which creates the SWFs. When using dashes, they are converted to numbers and later converted back to dashes with another small utility file, as otherwise your AS3 class files will fail to compile.


Step 3: Create AS3 Class File Template

Open up your code editor (I always use Notepad++ for multi language coding, it’s an amazing open source application).

In the following steps, I will sketch out possible elements for you to add to your class file definition, which will be used by your DOS file to generate all of your SWFs.

If you’d like to follow along by examining the class file I used for these snippets, open the source/lago.as file in your download package for this tutorial.

We begin by adding a generic package layout in AS3, which without any functions would look something like this:

package
{
import flash.display.Sprite;
import flash.display.*;    

    public class lago extends Sprite
    {  

    }
}

Now let’s add some actual items to our SWF!


Step 4: Embedding an MP3

As always, you begin by importing the necessary class files:

import flash.media.Sound;
import flash.media.SoundChannel;

Here is code to embed a sound at a static location. You’ll notice when we come to create our DOS file, we use the variables for our folder and file name instead.

  [Embed(source="C:/Users/You/Desktop/sound/lago.mp3")]
  public var soundClass:Class;
  var sndChannel:SoundChannel;
  var smallSound:Sound = new soundClass() as Sound;

Step 5: Embedding an Image

Here is code to embed an image:

    [Embed(source="C:/Users/You/Desktop/images/lago.swf")]
  public var Picture:Class;
  var pic:Sprite = new Picture();

In my file I first create a Sprite, which I add the image to, but if you want to add the picture directly to the stage you would just use:

addChild(pic);

Step 6: Embedding a Font

As I am using international characters, I embed my font by specifying which Unicode characters to include:

[Embed(mimeType="application/x-font", unicodeRange='U+0061-U+007A,U+00E1-U+00E1,U+00E9-U+00E9,U+00ED-U+00ED,U+00F1-U+00F1,U+003F-U+003F,U+00FA-U+00FA,U+00E1-U+00E1,U+00F3-U+00F3,U+00BF-U+00BF,U+00A1-U+00A1', source="C:/Users/You/Desktop/BradBunR.ttf",fontName="Brady")]
private var terminatorFontClass:Class;

To see which characters you need, you can check this chart here, found at the University of Wisconsin-Madison’s Space, Science, and Engineering Website. In Windows, you can also open up your charmap.exe program and look at the values for the characters you need.


Step 7: Using textFormat to Style Your Text

Begin by importing the necessary classes:

import flash.text.*;
import flash.text.TextFormat;
import flash.text.AntiAliasType;

Now create a textField and attach a textFormat to it:

var __text_tf:TextField = new TextField(),__format:TextFormat = new TextFormat();

Now let’s apply some styling to our text. I used a size for the text below, but in my actual file I adjust the size based on string length, so this size line would not be used.

__format.size = 30;
__format.font="Brady";
__format.letterSpacing=6;
__format.align = TextFormatAlign.CENTER;
__text_tf.width=500;
__text_tf.embedFonts = true;
__text_tf.wordWrap = true;
__text_tf.defaultTextFormat = __format;
__text_tf.autoSize="center";
__text_tf.text = str;

Step 8: Changing Font Size According to String Length

This was a bit of a tricky piece of code, but if you are trying to create bulk SWFs of phrases and even sentences rather than just single words, you’ll find that it’s necessary to accommodate for different string lengths. Otherwise some of your words will be either too big, or too small.

if (str.length <= 9) {
__format.size = 70;
} else if (str.length >= 14 && str.length <= 22) {
__format.size = 50;
__text_tf.defaultTextFormat = __format;
} else if (str.length >= 28 && str.length <= 48) {
__format.size = 40;
__text_tf.defaultTextFormat = __format;
} else {
__format.size = 50;
}

Of course you can change these values according to your own content needs.


Step 9: Centering Text in a textField

This line eluded me at first, and was crucial for getting my text to center properly in the textField.

__text_tf.autoSize="center";

Step 10: Centering and Proportionately Resizing an Image

This code took the better part of a day to get right, and is the only way I found to properly resize and center a SWF. You can change the x, y, targetHeight, and targetWidth values depending on the size of your own SWFs, but otherwise this code can help you achieve centering and resizing:

var ratio:Number;
var wide:Number;
var targetWidth:Number = 400;
var targetHeight:Number = 250;  

if (pic.width < targetWidth) {
ratio = targetWidth / pic.width;
pic.width  = targetWidth;
pic.height *= ratio;
wide = pic.width*ratio;
}
if (pic.height < targetHeight) {
ratio = targetHeight / pic.height;
pic.width  *= ratio;
pic.height  = targetHeight;
wide = pic.width*ratio;
}
if (pic.width > targetWidth) {
ratio = targetWidth / pic.width;
pic.width  *= ratio;
pic.height *= ratio;
wide = pic.width*ratio;
}
if (pic.height > targetHeight) {
ratio = targetHeight / pic.height;
pic.width  *= ratio;
pic.height *= ratio;
wide = pic.width*ratio;
}
pic.y = 110;
pic.x = 250 - wide/2 ;
pic.scaleX = pic.scaleY;
square.addChild(pic);

}


Step 11: DOS Version of Your AS3 Class File

Please take a look at the sample file source/lago.as if you need more help crafting your class file template, as now it’s time to create the DOS version of your file [...]