Showing posts with label flixel. Show all posts

Tuesday, February 28, 2012

Create a Top-Down RPG in Flixel: Your First Room

In this tutorial we will go from asking “What is Flixel?” to having an indoor room and a keyboard-controlled character in the top-down role playing game style (think Zelda).


Final Result Preview

Let’s take a look at the final result we will be working towards:


Step 1: Understanding the Project Structure

For the visual people among us, let’s see how everything will be organized so the rest will make sense.
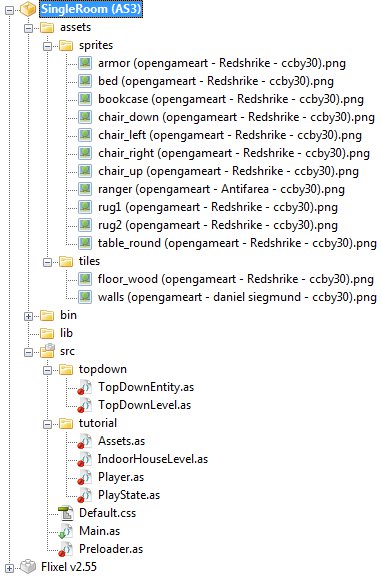
list of all the source files and folders used in the project

Basically, we have all of our artwork stored in the assets folder and all of our ActionScript files stored in the src folder. If you want to use this tutorial as the basis for your own game engine, the topdown folder contains the generic stuff (a.k.a. the engine) and the tutorial folder shows how to use it.

You’ll probably notice rather quickly that the art files have really long names. Rather than showing you a tutorial filled with compelling red boxes (the apex of my artistic ability), we will use some open source artwork from OpenGameArt. Each file is named to show the source, the artist, and the license. So, for example, armor (opengameart - Redshrike - ccby30).png means it’s an image of armor, downloaded from OpenGameArt, created by the artist known as Redshrike, and it uses the CC-BY-30 license (Creative Commons Attribution).

Long story short – these art files can be used for any purpose as long as we link back to the site and give credit to the artist.

Here’s a description of each source file in the project:

  • topdown/TopDownEntity.as – base class for any moveable sprites in our top-down RPG
  • topdown/TopDownLevel.as – base class for a top-down RPG level
  • tutorial/Assets.as – imports any images that we need to use in this tutorial
  • tutorial/IndoorHouseLevel.as – defines an indoor room with some objects lying around
  • tutorial/Player.as – a keyboard-controlled, animated Ranger
  • tutorial/PlayState.as – Flixel state that controls our game
  • Default.css – an empty file needed to prevent the Flex compiler from giving us a warning
  • Main.as – entry point for the application
  • Preloader.as – Flixel preloader

Now let’s get down to business!


Step 2: Firing Up Flixel

Flixel is a 2D game engine for ActionScript 3. To quote the home page:

Flixel is an open source game-making library that is completely free for personal or commercial use.

The most important thing to know about Flixel is that it is designed to use bitmap images (raster graphics) instead of Flash-style vector graphics. You can use Flash movie clips, but it takes a little massaging. Since I don’t feel like giving a massage today, we will be using images for all our art.

Flixel comes with a tool that creates a dummy project for you. This tool creates the three files that are in the root of our project: Default.css, Main.as, and Preloader.as. These three files form the basis for almost any project in Flixel. Since Default.css is just there to avoid a compiler warning, let’s take a look at Main.as.

package
{
 import org.flixel.*;
 import tutorial.*;

 [SWF(width="480", height="480", backgroundColor="#ffffff")]
 [Frame(factoryClass="Preloader")]
 public class Main extends FlxGame
 {
  /**
   * Constructor
   */
  public function Main() {
   super(240, 240, PlayState, 2);
  }
 }
}

There are only three lines of importance here. First off, we tell Flash to use a 480×480 window with a white background. Then we tell Flash to use our Preloader class while loading. Finally, we tell Flixel to use a 240×240 window (zooming in by a factor of 2 to make things look bigger) and to use PlayState once everything is ready to go.

Let me share a quick word about Flixel’s states. In Flixel, states are kind of like a window, but you can only have one at a time. So, for example, you could have a state for your game’s main menu (MainMenu), and when a user clicks the Start Game button you switch to PlayState. Since we want our game to just get going immediately, we just need one state (PlayState).

Next up is Preloader.as.

package
{
 import org.flixel.system.FlxPreloader;

 public class Preloader extends FlxPreloader
 {
  /**
   * Constructor
   */
  public function Preloader():void {
   className = "Main";
   super();
  }
 }
}

Not much to see here. Since we extend from FlxPreloader, Flixel really just takes care of it. The only thing to note is that if you changed Main to some other name, you would have to change className here on the highlighted line.

We’re almost up to seeing something on the screen now. All we need is a Flixel state to get the ball rolling, so here’s PlayState.as.

package tutorial
{
 import org.flixel.*;

 /**
  * State for actually playing the game
  * @author Cody Sandahl
  */
 public class PlayState extends FlxState
 {
  /**
   * Create state
   */
  override public function create():void {
   FlxG.mouse.show();
  }
 }
}

If you compiled this code, you’d get a marvelous black screen with a mouse cursor. Never fear, it gets better from here.


Step 3: Creating a Basic Level

[...]

Read more: Create a Top-Down RPG in Flixel: Your First Room

Wednesday, November 2, 2011

Flash Game Dev Tip #14 – How to create a Flixel plugin

Tip #14 - How to create a Flixel plugin When Adam created Flixel 2.5 he added support for plugins. Probably due to my constant harassing him on GTalk about it, but he did it all the same! And lots of my Flixel Power Tools take advantage of them. But it's not always easy to know when you [...]

Flash Game Dev Tip #14 – How to create a Flixel plugin

Thursday, August 18, 2011

Flash Game Dev Tip #11 – The Flixel Display List Explained

Flash Game Dev Tip #11

Tip #11 – The Flixel Display List Explained

This question comes up on the flixel forums so often that I feel it warrants a post of all its own. Flixel 2.5 changed the way in which the game is rendered. And it’s important to know the order of the display objects if you ever want to do anything such as insert a 3rd party API like Flint, or  display the Flixel mouse cursor on-top of a Mochi leaderboard.

Flixel Display Objects != Display Objects

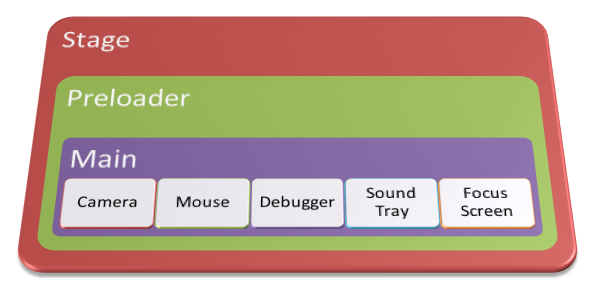
If you are familiar with Flash then you’ll know about Display Objects and how using addChild() allows you to parent them for easy grouping. Flixel uses native Display Objects but only for a few key elements. The following illustration explains the parenting involved:

Display List Structure in Flixel

Stage is the root of your SWF and parent of all Display Objects. It will contain your Preloader which itself usually extends a Sprite or MovieClip. This in turn contains Main which in most cases extends FlxGame, which is a Sprite [...]

Flash Game Dev Tip #11 – The Flixel Display List Explained

Monday, July 25, 2011

FlashPunk + Flixel = Flxpunk

Do you want to use the Flixel movement code at the FlashPunk project?

net.flxpunk package:

  • FlxEntity – Extends Entity class with Flixel movement code (velocity, acceleration, path, etc.)
  • FlxTween – Movement controller as a FlashPunk Tween extension
  • FlxPathFinding – Path finding stuff. Used Grid for a collision map.
  • FlxPath – This is a simple path data container.
...
// a collision grid
var grid:Grid = new Grid(720, 480, 24, 24);
grid.loadFromString(new LEVEL());
...
var pf:FlxPathFinding = new FlxPathFinding(grid);
var path:FlxPath= pf.findPath(unit.flx.getMidpoint(), new Point(mouseX, mouseY), true);
unit.flx.followPath(path, 60, FlxPath.PATH_FORWARD);
...

Github wiki
Download source code with example  

Read more: FlashPunk + Flixel = Flxpunk

Friday, July 22, 2011

Flash Game Dev Tip #10 – Flixels Internal Structure and Performance Tips

Flixels Internal Structure and Performance Tips

Tip #10 – Flixels Internal Structure and Performance Tips

If you’ve ever wondered just what Flixel does when it starts-up or runs its main loop, then wonder no more :) Here’s the full gory details, with some take-away performance tips at the end.
The Instantiation Process

All games in Flixel extend the FlxGame class, which in turn extends Sprite. When the game is created the following process happens, in the following order:

  1. It hides the system mouse cursor
  2. Calls FlxG.init which clears the bitmap cache, creates a new Sprite (flashGfxSprite) and creates an empty cameras Array
  3. Sets the internal game frame rate
  4. Sets the Flash Player frame rate
  5. Adds an ENTER_FRAME Event Listener which triggers FlxGame.create

Frame rates

Flixel 2.5 uses a Deterministic Delta Timer to handle steps within the framework. A step (as you’ll see later) is processed in the main loop, and is when Flixel performs all of the collision, separation and movement calculations. This is not the same thing as when it renders the game. When you create your game you have to tell FlxGame what game frame rate and Flash Player frame rates you want. From these two values it does the following:
  • Sets the step to be 1000 / Game Frame Rate. So a rate of 30 updates per second would equal a step of 33.
  • Sets the Maximum Accumulation (maxAcc) value to 2000 / Flash Player Frame Rate (fps) – 1.
  • So an fps rate of 30 would equal a maxAcc of 66. The maxAcc can never be less than step.
Read more: Flash Game Dev Tip #10 – Flixels Internal Structure and Performance Tips

Friday, June 17, 2011

Flixel Power Tools v1.7 – Kaboom!

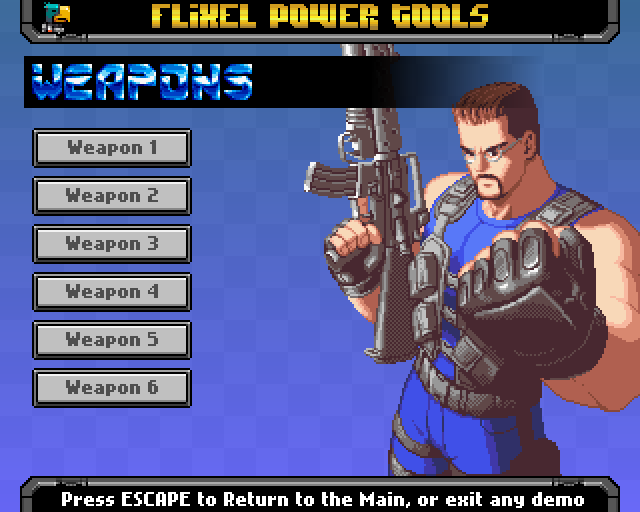
Flixel Power Tools FlxWeapon Menu Options

It’s been a month in development but it’s finally here – Version 1.7 of the Flixel Power Tools has now gone from dev to master – and I urge you all to give it a play! I have also re-organised my site so that the tools and all sub-classes are now easily accessible from the right-hand side bar. More info, more screen shots, less scrolling :)

V1.7 includes a brand new Demo Suite system (don’t forget to try the Credits button :) ). It’s now easier and quicker to get to the examples, which is just as well as we’ve over 60 of them in this release. Don’t forget to download the whole package from github, as it includes a Getting Started manual PDF, the full source code to all of the demos, all of the graphical and audio assets (warning: copyright, don’t use commercially!), as well as the tools themselves [...]

Read more: Flixel Power Tools v1.7 – Kaboom!

Friday, April 15, 2011

Video of me coding Breakout in Flixel in 20 mins

coding Breakout in Flixel in 20 mins

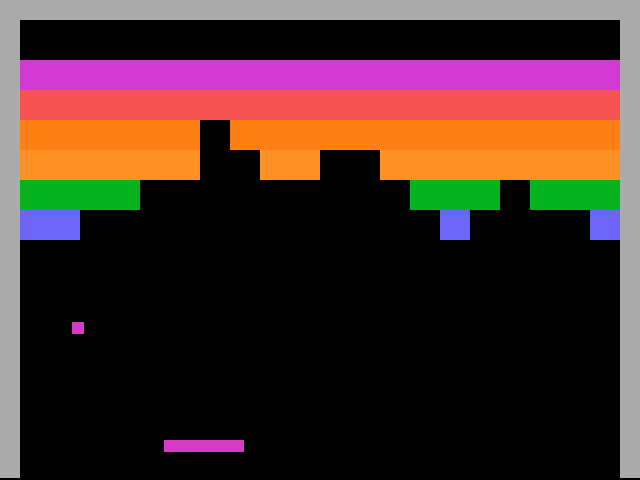
Having spent the past couple of days deep in Microsoft Word writing tech specs, I was desperate to do some coding. But I only had a 1 hour lunch break available. So I picked a game: Breakout (Atari 2600 style), found a reference screen shot online to get the colours from, fired-up FlashDevelop, hit record and started coding.

20mins later and it was done. I then hastily cut this video together and uploaded to YouTube (which ironically took longer than coding did). Here’s the video embedded. I sped it up x2 for sanity sake, and it’s a nice way of hiding my typos :) If you can please watch it in HD on the YouTube site, it’s much easier to see what I’m coding!

Watch on YouTube

Ok so it’s not a gaming master-piece, but there’s a real solid shell of a game here you are free to take and expand as you wish. The first thing you may want to do is drop the “cheat wall” from the bottom, add some lives, a score and level progression :)

Full source code after the jump.

This is for Flixel v2.5. Create a new Project that is 640×480 at 60fps, with a black background. My thanks to Adam for clarifying some new 2.5 nuances before I started this :)

Read more: Video of me coding Breakout in Flixel in 20 mins

Tuesday, April 5, 2011

Flash Game Dev Tip #8 – Building a Shoot-em-up Part 3 – Return Fire

Flash Game Dev Tip #8 – Building a Shoot-em-up Part 3 – Return Fire:

Flash Game Dev Tips logo

Tip #8 – Flixel – Building a Shoot-em-up, Part 3 – Return Fire

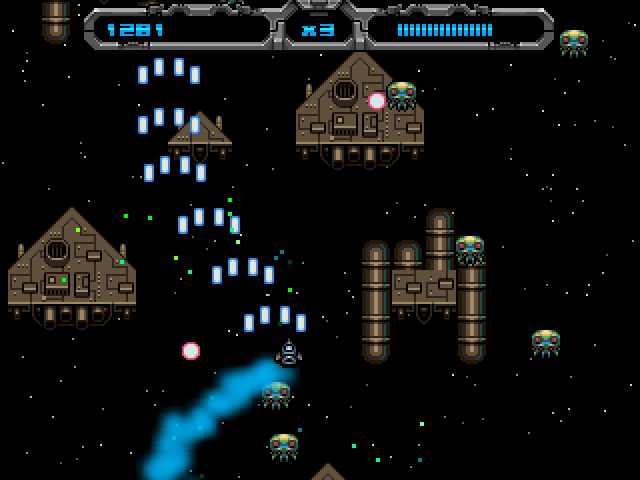
This tip follows-on from Tip #4, where we added enemies and explosions into our game. But it was a little one-sided. This time the enemy are going to shoot back. And you’ll feel it, by way of a health bar and set of lives in our new HUD. Finally we’ll drop in the scrolling tile-map background and simple menu / game-over states. By the end it will look like this:

Scrolling tile-map background and simple menu and game-over states

Note: I’ve embedded the game at the bottom of the tip.

Return Fire

Last time we added the Enemy Manager, which spawned a regular supply of enemies at us. Each enemy had a launch function which set it moving. Let’s add the ability to fire to that:

// Will they shoot at the player? 70% chance of doing so
if (FlxMath.chanceRoll(70))
{
 willFire = true;
 fireTime = new FlxDelay(1000 + int(Math.random() * 500));
 fireTime.start();
}

This uses a new FlxMath function chanceRoll. The enemy has a 70% chance of firing at you. If this happens we create a new FlxDelay Timer of 1 second + up to an extra 0.5 second, and start it running.

Then in the Enemy update function we check that timer:

if (willFire && fireTime.hasExpired)
{
 Registry.enemyBullets.fire(x, y);
 willFire = false;
}

As you can see, this is calling the fire function in our Enemy Bullet Manager, passing in the x/y coordinates of the Enemy, which launches a bullet from the bullet pool:

public function fire(bx:int, by:int):void
{
 x = bx;
 y = by;
 FlxVelocity.moveTowardsObject(this, Registry.player, speed);
 exists = true;
}

FlxVelocity tells the bullet (this) to move towards the player at the value of speed (which in our case is 240 pixels per second).

Pixel Perfect Collision

If you are unlucky enough to be hit by our new enemy bullets then we need to damage your health.

Previously the game used native flixel collision, which is based on bounding-boxes (i.e. the rectangle that encloses your sprite). This isn’t desirable in a shoot-em-up. It meant the player could get shot without the enemy bullet even visually touching him. To address this we simply add one check into our bulletHitPlayer function [...]

FlxHealthBar added to Flixel Power Tools

FlxHealthBar added to Flixel Power Tools:

FlxHealthBar

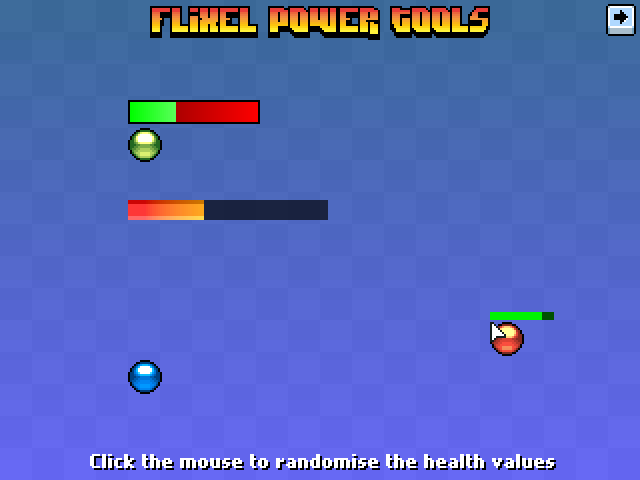
Health bars are a commonly used feature in games. From little health bars floating over players / enemies heads, to bars in the UI / HUD. This class provides a really fast way to create them, and they are highly customisable. It features:

  • 3 different types of bar: Plain-colour filled, Gradient filled or Image filled
  • All fill types support alpha levels
  • Optional 1px border around the bar with configurable colour
  • The bar can fill in one of 3 directions: From left to right, right to left or from the inside out
  • Bars are associated with FlxSprites (its parent). When the health value of the parent changes, the bar updates automatically (within a given threshold limit)
  • Bar can be fixed on-screen, and supports scrollFactor
  • Bar can “float” with its parent at a given x/y offset from the parents origin
//  Create a tiny 32x4 health bar that floats above the 'wolf' sprite
wolfHealth = new FlxHealthBar(wolf, 32, 4, 0, 100);
//  Tells it to track the x/y position of the wolf FlxSprite but offset by -5px on Y
wolfHealth.trackParent(0, -5);

Visit the Flixel Power Tools page to see it in action in the Test Suite, and find the svn download details.

Saturday, April 2, 2011

Flash Game Dev Tip #7 – Introducing the Flixel Power Tools

Flash Game Dev Tip #7 – Introducing the Flixel Power Tools:

Flash Game Dev Tip #7

Tip #7 – Introducing the Flixel Power Tools

Quite frankly flixel is awesome. It allows me to rapidly build games. The sort of games I like playing (and therefore making!) While it does a lot for you it is lacking in a few key areas. After all it’s just a framework, and frameworks are meant to be built-upon.

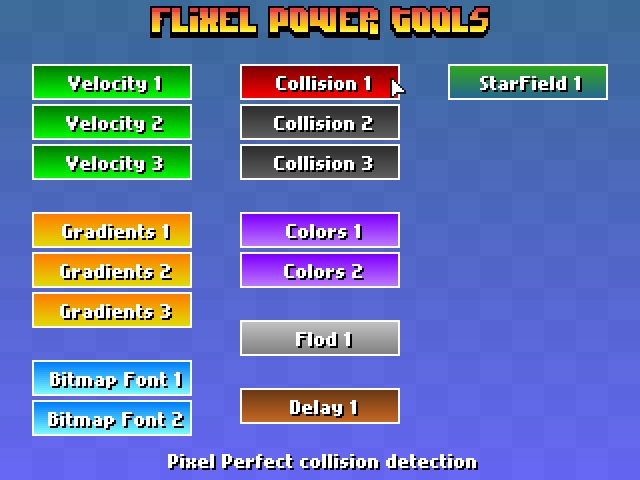
That is where the Flixel Power Tools come in! At the time of writing there are 13 new classes, all neatly arranged in a single package, that push flixel just that little bit further. There is also a test suite which include 16 easy-to-follow examples of the power tools in action, with a funky visual menu system and a way to actually see what they do. I always find it easier to learn by looking and then checking out the code!

Flixel power tools menu

The majority of these tools work without even touching the core flixel code-base. Although there are some that do require it, so with that in mind I’ve provided a fully Patched version of flixel 2.43. But if you’ve got your own build there are instructions on manually patching at the top of each class that needs it, and work-arounds should you not want to touch anything at all!

I will continue to expand the library of tools and the test suite. And of course keep them in-line with the way in which the flixel codebase is changing at the moment. For now here is a quick overview of what each new class offers:

FlxBitmapFont

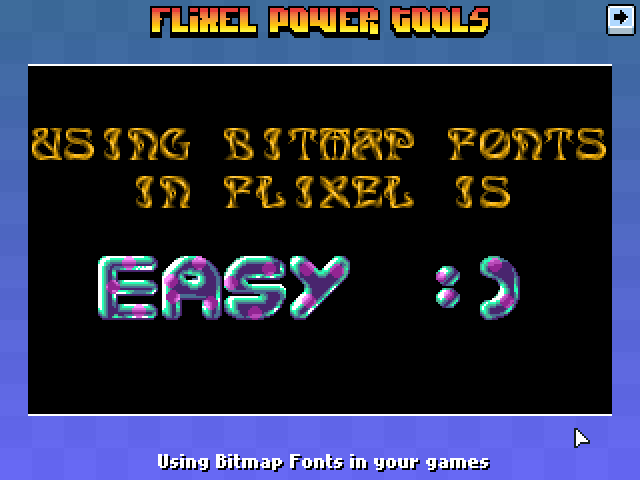
Allows you to use bitmap fonts in your games very easily. It’s extremely fast. Fast-enough for real-time updates, or a GUI or HUD display. The rendered text is just a normal FlxSprite, so you can do with it whatever you like. Extensive character-set handling options and fully documented.

Flixel power tools fonts


font = new FlxBitmapFont(bluepinkFontPNG, 32, 32, FlxBitmapFont.TEXT_SET2, 10);
font.setText('easy :) ', true, 0, 8, FlxBitmapFont.ALIGN_CENTER);

FlxButtonPlus

Takes the FlxButton class you already know, and then pimps it out some! You can specify parameters for the callback, the button width, height and text in the constructor. Change the button text dynamically. Set hover-over and hover-out callbacks. And the default button style is now a nice gradient filled affair (which you can control the gradient colours of yourself). Or just use loadGraphic to replace it.


playback = new FlxButtonPlus(32, 32, toggleMusic, null, 'Play Music');

FlxCollision

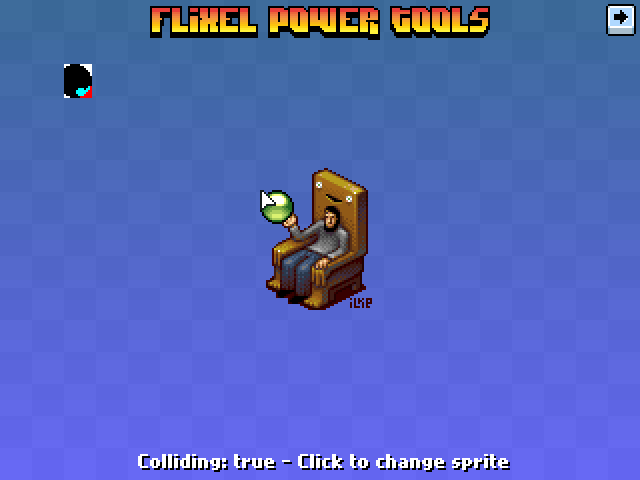
Collision in flixel is handled with bounding boxes. Which is basically two rectangles colliding, and if they intersect you get a collision back. This class takes it the necessary step further and adds pixel perfect collision testing. Only the intersecting area is tested for speed. And you have control over the alpha tolerance level (so you can exclude pixels with an alpha level less than what you need). It also works with scaled, rotated or animated FlxSprites! and is perfectly fast enough to use in real-time.

Flixel power tools collision


if (FlxCollision.pixelPerfectCheck(player, spikes))
{
    // Player really did hit those spikes!
}

FlxColor

[...]

Saturday, March 5, 2011

Flash Game Dev Tip #4 – Bullet Manager Part 2

Flash Game Dev Tip #4 – Bullet Manager Part 2: "

Flash Game Dev Tip #4

Tip #4 – Flixel – Bullet Manager Part 2

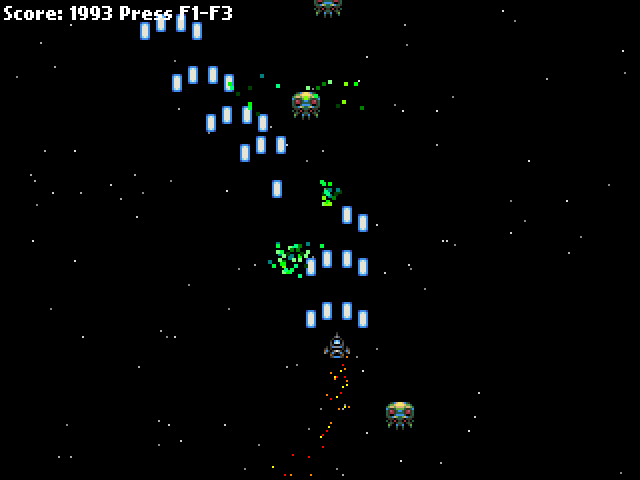
This tip follows-on from Tip #3, where we got a player controlled space-ship up, and had it fire all kinds of bullet death. In this tip we’re going to add something to use those bullets on – an Enemy manager, and a particle effect for when they are shot. By the end it’ll look like this:

Bullet manager demo-2

Enemy Manager

As with the bullets in the previous tip we are going to create an Enemy Manager. This class will be responsible for creating a pool of enemies, launching them and recycling them when killed.


package
{
 import org.flixel.*;
 import flash.utils.getTimer;

 public class EnemyManager extends FlxGroup
 {
  private var lastReleased:int;
  private var releaseRate:int = 500;

  public function EnemyManager()
  {
   super();

   for (var i:int = 0; i < 100; i++)
   {
    add(new Enemy);
   }
  }

  public function release():void
  {
   var enemy:Enemy = Enemy(getFirstAvail());

   if (enemy)
   {
    enemy.launch();
   }
  }

  override public function update():void
  {
   super.update();

   if (getTimer() > lastReleased + releaseRate)
   {
    lastReleased = getTimer();

    release();
   }
  }

  public function bulletHitEnemy(bullet:FlxObject, enemy:FlxObject):void
  {
   bullet.kill();

   enemy.hurt(1);

   Registry.fx.explodeBlock(enemy.x, enemy.y);

   FlxG.score += 1;
  }

 }

}

Our Enemy Manager works identically to the Bullet Manager from before. It starts by creating a pool of 100 enemies, which I admit is probably 90 more than we actually need at this stage of the game! Enemies are just extensions of an FlxSprite, and by default they have their exists value set to false, so they are free for allocation by the manager.

The manager overrides the flixel update function. All we do in there is check the value of the timer. getTimer() is a Flash utility class that gives you the number of milliseconds since the SWF started playing. It’s a really good way of timing things without having to use Timer Events, as it’s just integer based, fast and pretty accurate.

Our releaseRate is set to 500. That’s in milliseconds, so 500 would be every half a second (1000 ms per second). If enough time has elapsed we release a new enemy. This simply pull the next available enemy from the pool and call its launch function.

The enemy class looks like this [...]

Saturday, February 26, 2011

Flash Game Dev Tip #3 – Bullet Manager Part 1

Flash Game Dev Tip #3 – Bullet Manager Part 1:

Flash Game Dev Tip #3

Tip #3 – Flixel – Bullet Manager Part 1

If you are coding a shoot-em-up, or even a platformer with guns, then you’ll have a need for the player to be able to fire bullets. Or the enemies to fire at you. This tip is about creating a Bullet Manager class. The class is responsible for the launch, update, pooling and re-use of bullets.

Object Pool

Creating new objects in Flash is expensive. By “new objects” I mean code such as:

var bullet:Bullet = new Bullet();

… which creates a brand new object an assigns it to bullet.

And by “expensive” I mean it takes time for Flash to process the request for the new object, assign memory to it and create it. If you are firing off tens of bullets every few seconds this can take its toll. And if you don’t actively clean-up the objects created you can quickly run out of resources.

To mitigate this problem we create a “pool”. This is a pool of resources (in our case bullets) that the Bullet Manager can dip in to. It will look for a free bullet, and recycle it for use in the game. When the bullet has finished doing what bullets do best, it will free itself up for use again. By using a pool you avoid creating new objects on the fly, and help keep memory in check.

Meet FlxGroup

Thankfully flixel has a class you can use to make this process simple. It’s called FlxGroup. You can add objects to a group, there are plenty of  functions for getting the next available resource, and you can even perform group to group collision. Objects in a group are all rendered on the same layer, so are easy to position within your game. The first task is to create a pool of bullets to draw from.

In this example we’ve got a class called Bullet.as. Bullet extends FlxSprite with a few extra values such as damage and bullet type [...]