In this tutorial we will go from asking “What is Flixel?” to having an indoor room and a keyboard-controlled character in the top-down role playing game style (think Zelda).
Final Result Preview
Let’s take a look at the final result we will be working towards:
Step 1: Understanding the Project Structure
For the visual people among us, let’s see how everything will be organized so the rest will make sense.
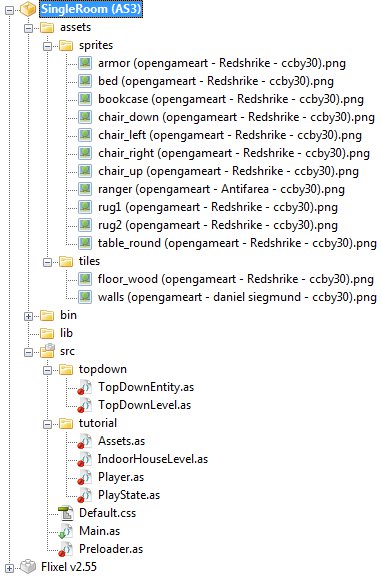
Basically, we have all of our artwork stored in the assets folder and all of our ActionScript files stored in the src folder. If you want to use this tutorial as the basis for your own game engine, the topdown folder contains the generic stuff (a.k.a. the engine) and the tutorial folder shows how to use it.
You’ll probably notice rather quickly that the art files have really long names. Rather than showing you a tutorial filled with compelling red boxes (the apex of my artistic ability), we will use some open source artwork from OpenGameArt. Each file is named to show the source, the artist, and the license. So, for example, armor (opengameart - Redshrike - ccby30).png means it’s an image of armor, downloaded from OpenGameArt, created by the artist known as Redshrike, and it uses the CC-BY-30 license (Creative Commons Attribution).
Long story short – these art files can be used for any purpose as long as we link back to the site and give credit to the artist.
Here’s a description of each source file in the project:
topdown/TopDownEntity.as– base class for any moveable sprites in our top-down RPGtopdown/TopDownLevel.as– base class for a top-down RPG leveltutorial/Assets.as– imports any images that we need to use in this tutorialtutorial/IndoorHouseLevel.as– defines an indoor room with some objects lying aroundtutorial/Player.as– a keyboard-controlled, animated Rangertutorial/PlayState.as– Flixel state that controls our gameDefault.css– an empty file needed to prevent the Flex compiler from giving us a warningMain.as– entry point for the applicationPreloader.as– Flixel preloader
Now let’s get down to business!
Step 2: Firing Up Flixel
Flixel is a 2D game engine for ActionScript 3. To quote the home page:
Flixel is an open source game-making library that is completely free for personal or commercial use.
The most important thing to know about Flixel is that it is designed to use bitmap images (raster graphics) instead of Flash-style vector graphics. You can use Flash movie clips, but it takes a little massaging. Since I don’t feel like giving a massage today, we will be using images for all our art.
Flixel comes with a tool that creates a dummy project for you. This tool creates the three files that are in the root of our project: Default.css, Main.as, and Preloader.as. These three files form the basis for almost any project in Flixel. Since Default.css is just there to avoid a compiler warning, let’s take a look at Main.as.
package
{
 import org.flixel.*;
 import tutorial.*;

 [SWF(width="480", height="480", backgroundColor="#ffffff")]
 [Frame(factoryClass="Preloader")]
 public class Main extends FlxGame
 {
  /**
   * Constructor
   */
  public function Main() {
   super(240, 240, PlayState, 2);
  }
 }
}
There are only three lines of importance here. First off, we tell Flash to use a 480×480 window with a white background. Then we tell Flash to use our Preloader class while loading. Finally, we tell Flixel to use a 240×240 window (zooming in by a factor of 2 to make things look bigger) and to use PlayState once everything is ready to go.
Let me share a quick word about Flixel’s states. In Flixel, states are kind of like a window, but you can only have one at a time. So, for example, you could have a state for your game’s main menu (MainMenu), and when a user clicks the Start Game button you switch to PlayState. Since we want our game to just get going immediately, we just need one state (PlayState).
Next up is Preloader.as.
package
{
 import org.flixel.system.FlxPreloader;

 public class Preloader extends FlxPreloader
 {
  /**
   * Constructor
   */
  public function Preloader():void {
   className = "Main";
   super();
  }
 }
}
Not much to see here. Since we extend from FlxPreloader, Flixel really just takes care of it. The only thing to note is that if you changed Main to some other name, you would have to change className here on the highlighted line.
We’re almost up to seeing something on the screen now. All we need is a Flixel state to get the ball rolling, so here’s PlayState.as.
package tutorial
{
 import org.flixel.*;

 /**
  * State for actually playing the game
  * @author Cody Sandahl
  */
 public class PlayState extends FlxState
 {
  /**
   * Create state
   */
  override public function create():void {
   FlxG.mouse.show();
  }
 }
}
If you compiled this code, you’d get a marvelous black screen with a mouse cursor. Never fear, it gets better from here.
Step 3: Creating a Basic Level
[...]
Read more: Create a Top-Down RPG in Flixel: Your First Room
No comments:
Post a Comment