Have you ever been amazed at the variety of attacks in fighting games like Mortal Kombat, Super Smash Bros, Soul Calibur and others? Now you can learn how to create an engine to detect key combinations and build your own fighting game as well!
Final Result Preview
Let’s take a look at the final result we will be working towards:
The combos in this demo are: ASDF, AAA, and SSS. Type them!
Step 1: Introduction
Ever wanted to build a fighting game (or any other genre) with lots of combos? In this tutorial we will create a simple class to detect key combos and tell us when a combo has been done by the user. We will also create a very simple graphical interface to let us test our class.
Step 2: Starting a New Project
For this tutorial, we will use FlashDevelop‘s pure AS3 project with preloader. We will create a project with a preloader only to make it easy for you if you want to keep working on the final result towards a game. Let’s start by opening FlashDevelop and selecting our project:
With that, we can begin working on our classes.
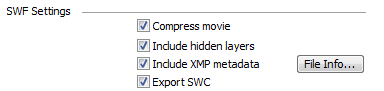
In order to use the graphics we’ll create in Flash Pro within our AS3 project, we need to export our images from the .fla file to a .swc format. More information about this format can be found in Option 2 of this guide to FlashDevelop. Create a new AS3 FLA in Flash Professional, then change the settings on our .fla file to export its content to a .swc format: go to File > Publish Settings (or press Ctrl+Shift+F12) and check the “Export SWC” box under the “Flash” tab.
If you don’t have Flash Professional, don’t worry. I’ve included the final SWC file in the download package for this tutorial. Download it, then skip to Step 6.
Step 3: The Basic Shape of the Button
We will first create all the graphical part and worry only with the code later. Since we will be dealing with key combos, let’s create a button with a letter in it to represent a key. Our button will be very simple: three circles with different colors and some filters in it. That’s how I built mine: a big gray circle with a white circle on top of it, and a red circle on top of the white one. After that, I applied a glow and two drop shadow filters on the red circle in order to get the final result, which is included in the source files.

For more details on how the button was built, grab the source files for this tutorial!
Step 4: Up and Down Images
We now have to give our button “up” and “down” images. Before doing that, we need to turn it into a symbol. Let’s convert it to a symbol, give it a name of KeyButtonImage and export it as “SWCAssets.KeyButtonImage”. We are adding the SWCAssets package in the class name for organization purposes when we start coding. This will be more clear later [...]
No comments:
Post a Comment